Where to Buy the Best 3 8 Male Compression Fitting Online

Female compression fittings deliver a practical, reliable way for connecting pipes and tubing. They do away with the need for solder or welded joints. This guide delves into the function of female compression fittings, breaking down how the compression nut and ferrule create a tight seal. It also points out their importance in both plumbing and HVAC applications.
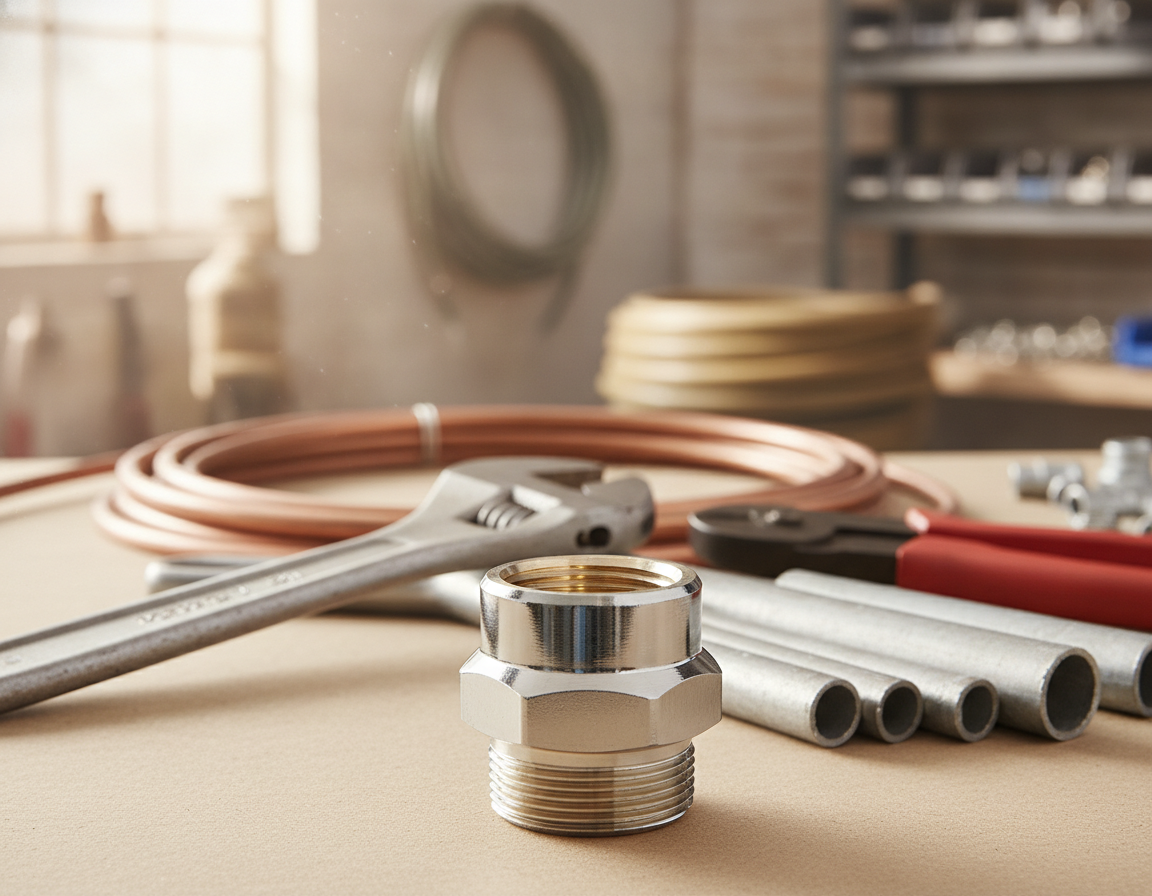

Using high-quality pipe fittings can meaningfully cut energy losses. This also helps stop refrigerant or water leaks, which can harm the environment. HVAC systems, which include components like compressors, condensers, expansion valves, and evaporators, rely on robust connections. Matching the appropriate female compression fitting and compatible materials—such as brass, copper, stainless steel, PVC, or PEX—is essential for long-term system performance.

In many plumbing systems, PEX or PVC with compression fittings are often preferred for their ease of service and low heat exposure. On the other hand, refrigeration lines require fittings that can withstand thermal fatigue and keep a seal across a wide temperature range. InstallationPartsSupply.com and its product lines cater to these needs, stocking common sizes and parts such as ferrules and compression nuts.

Female Compression Fitting

Key Takeaways

  • Female compression fittings uses a compression nut and ferrule to seal without soldering.
  • Selecting the right material—brass, copper, stainless, PVC, or PEX—prevents corrosion and failure.
  • Correct fittings lower energy loss and help stop refrigerant or water leaks in HVAC and plumbing systems.
  • Compression fittings guide resources and suppliers like InstallationPartsSupply.com streamline part selection.
  • Inspect ferrules and tighten per manufacturer torque to ensure a long-lasting seal.

Understanding Compression Fittings And HVAC Vs Plumbing Applications

Compression fittings join pipes and tubing without solder or welding. They are ideal for copper, PEX, PVC, and stainless lines where heat or flame is best avoided. Many professionals source parts from Installation Parts Supply to help maintain consistent quality and fit.

How A Compression Fitting Works

A compression fitting uses a nut and a ferrule olive pressed against the pipe by the fitting body. The tightening action compresses the brass ferrule or sleeve, which locks onto the outer pipe and forms a seal. This mechanical action demonstrates the common question of what is a compression fitting by showing how mechanical compression creates a leak-tight joint.

Key Differences Between HVAC And Plumbing Fittings

HVAC fittings need to manage refrigerants, wider temperature swings, and thermal fatigue. Plumbing fittings are commonly selected for potable water, wastewater, and pressure from building systems. In the HVAC-versus-plumbing comparison, selection depends on media, service temperature, and pressure ratings.

Systems such as split systems, VRF, and rooftop units often use copper fittings and brazed joints for refrigerant lines. Plumbing applications often favor PEX compression and PVC for drains, where solvent welds or crimp systems are common.

Brass, Copper, Stainless Steel, PVC, And PEX Materials

Copper fittings are valued for excellent thermal conductivity and corrosion resistance. Brass fittings and ferrules withstand wear and are common in many compression fittings. Stainless steel suits corrosive or high-pressure environments.

PEX compression works well in domestic water lines because it handles freeze-thaw cycles and is flexible. PVC is commonly used as a low-cost option for drains and certain chilled-water circuits when pressure is low.

Fitting Material Usual Application Key Strengths Drawbacks
Copper Components Refrigerant piping and potable water Thermally conductive, durable, and solderable Higher cost, prone to mechanical damage
Brass Components Ferrules, nuts, and compression fittings Machinable and resistant to corrosion Galvanic risk with dissimilar metals
Stainless steel Demanding corrosive applications Extremely durable and corrosion-resistant Costly, harder to machine
PEX Pipe Residential hot/cold water Flexible, freeze-resistant Requires compatible PEX compression fittings
PVC Components Drainage and low-pressure cooling circuits Affordable and easy to work with Unsuitable for high heat or high pressure

Fitting Selection, Energy Efficiency, And Leak Prevention

Choosing the right fitting reduces leak risk and maintains system pressure. Within refrigeration systems, a poor joint can release refrigerant and lower efficiency. Correctly matched fittings and seals cut maintenance and lower energy waste.

Selecting the correct ferrule olive and matching copper fittings or PEX compression hardware reduces the chance of galvanic corrosion and thermal fatigue. That selection strategy improves service life and keeps HVAC and plumbing systems running efficiently.

Female Compression Fittings

A female compression fitting secures a pipe or tube end when a nut compresses the ferrule olive against the fitting body. This joint allows for tight connections without soldering, making it common in plumbing and HVAC. Unions and adapters allow quick disassembly for service or instrument changes.

Definition And Common Configurations

A standard assembly contains a female compression nut, a ferrule olive, and the fitting body. The compression nut fastens to the fitting body and compresses the ferrule to grip the tube. Many installations rely on unions, straight fittings, or elbow bodies to adapt direction and access during maintenance.

Materials And Compatibility

Brass and copper are typical choices for refrigerant fittings and hot-water lines due to their ability to tolerate thermal cycles and resist deformation. Stainless steel is chosen for high-pressure or corrosive environments. PVC and PEX suit condensate and domestic water runs, but they require proper inserts or specific ferrules for secure joints.

Typical Uses In Plumbing, HVAC Refrigerant Lines, And Instrumentation

In standard plumbing work, female compression fittings link stops, valves, and supply lines without solder. In HVAC, technicians use them on refrigerant fittings between compressor, condenser, and evaporator where service access is critical. Instrumentation and gas lines often rely on compression parts for leak-tight, serviceable connections.

Comparing Female Compression Fittings, Male Fittings, And Adapters

A female fitting accepts a male end and form the receiving thread, while a 3 8 Male Compression Fitting provides that mating male component for tubing or ports. A 3/8 Valve Adapter lets technicians interface service valves and gauges to the system. Choosing matched materials prevents galvanic corrosion and keeps joints reliable under pressure and thermal change.

Fitting Component Typical Material Usual Application Service Note
Compression nut Machined brass Plumbing feeds and shutoff connections Replace if rounded or cracked
Sealing ferrule Brass and stainless options Seals around copper, brass, or compatible PEX Often should be replaced during service
Body of fitting Brass or stainless steel Instrumentation and HVAC refrigerant fittings Match material to refrigerant and pressure rating
3/8 Male Compression Fitting Brass, copper Small-diameter line connection to female ports Confirm thread and seat match
3/8 service valve adapter Brass Service-gauge interfaces and manifold hoses Match seals to refrigerant fittings
Installation Parts Supply product line Material options vary Supplier for compatible kits and replacement parts Buy compatible ferrules and nuts for system longevity

Compression Fitting Types, Sizes, And Adapters For Plumbing And HVAC

This overview covers the various fitting types, sizes, and adapters essential for plumbing and HVAC projects. Technicians rely on couplings, elbows, unions, and adapters to manage line routing, component isolation, and service access. The right combination of parts significantly impacts system performance, including pressure rating, temperature limits, and reliability.

Compression couplings and related unions support the creation of removable joints for maintenance and testing. Straight couplings are useful for straight connections, while compression unions are helpful for components that need to be disconnected without disrupting the line. For short runs, a 3/8 Compression Coupling is often used in instrumentation and refrigeration applications.

Adapters and elbows make it easier to handle tubing routing around obstacles and for connecting different types of fittings. A 3 8 Male Compression Fitting is used to connect to a female port or adapter, facilitating the integration of service valves and gauges. Installation Parts Supply catalogs offer a wide range of these components, ensuring quick access on job sites.

Selecting the correct size is essential, depending on the tube’s outside diameter and the ferrule and nut set. Make sure the female compression fitting size matches the tube OD to prevent leaks. For 3/8″ applications, verify ferrule compatibility and torque specifications. Before final selection, check the system’s maximum pressure and temperature ratings before making a final selection.

Specialized parts like the Max Adaptor and 3/8 Valve Adapter are designed for connecting gauges, service ports, and small refrigerant lines. These parts help simplify the process of charging and diagnostics in HVAC systems. In compact HVAC systems, a 3/8 Valve Adapter is commonly used to link manifold hoses to service valves on compact systems.

Choosing material involves a trade-off between durability and corrosion resistance. Stainless steel provides strong corrosion resistance and durability, making it suitable for harsh environments. Brass and copper are good for refrigerant circuits and heat transfer lines due to their balance of machinability and corrosion protection. PVC and PEX are appropriate for low-pressure condensate and water lines but not for high-pressure refrigerant service.

The environmental performance of fittings relates to leak prevention and recyclability. Well-sealed metal fittings can lower refrigerant emissions and can be recycled at the end of their life. Purchasing quality components from trusted suppliers reduces failures and minimizes long-term environmental risk.

Below is a comparison to help choose between common options by application, pressure, temperature, and reusability.

Fitting Type Typical Use Approximate Max Pressure Temperature Range Reuse Potential
Brass coupling Small plumbing runs, instrumentation, and refrigerant lines Up to 3,000 psi varies by spec Approximately -65°F to 250°F Limited; reusable if ferrule intact
Compression union in brass or stainless Disconnect points for maintenance As high as 2,500 psi Typical range from -65°F to 300°F Good reuse potential for service access
3/8 Compression Coupling Small plumbing, refrigeration, and instrumentation use Rating varies by system and material Verify material specification for HVAC use Some reuse possible, but service replacement is common
Small male compression fitting Interface for valves, gauges, and small lines Depends on refrigerant-rated brass or stainless construction Works across common HVAC cycles when specified Reusable if undamaged
Brass/stainless Max Adaptor Special service coupling for gauges and valves High; designed for service tools Designed around HVAC service cycles Built for repeated connection and removal
PVC/PEX fittings Low-pressure water and condensate lines Low rating and unsuitable for refrigerant Usually 32°F to 140°F Limited reuse depending on system and UV exposure

Before ordering, check Installation Parts Supply or other reputable distributors for part numbers, material options, and pressure ratings. Ensure that the chosen 3/8 Valve Adapter or Max Adaptor matches both the tubing OD and the service fitting type to avoid mismatches on site.

Best Practices For Installation And Maintenance

Correct compression fitting installation begins with clean, square pipe ends and the right parts. For refrigerant lines in HVAC systems, use copper and brass. For condensate lines or chilled-water systems, PVC or PEX is best. Always follow manufacturer specs and ASME B31.5 to minimize energy loss and leaks.

How to install compression fittings

1. Begin by cutting and deburring the tube to a square face. 2. After that, slide the nut and ferrule onto the pipe in that order. 3. With softer plastic tubing, insert pipe inserts to keep the tube round before assembly. 4. Hand-tighten the nut, then use the two-wrench technique to finish the joint.

Tools and tightening techniques

Use a two-wrench method to hold the fitting body and turn the nut to prevent tube twist. Follow tightening guidance from the fitting maker or Installation Parts Supply when available. A common method is to snug by hand, then add a limited number of wrench turns.

Using pipe inserts correctly

Pipe inserts should be used with soft plastic tubing like PEX or thin-wall PVC to prevent ovalization and ensure a leak-free seal. Do not use inserts in solid copper or thick-walled metal tubing, where inserts can interfere with proper ferrule compression.

Common mistakes and ferrule removal

Do not under-tighten or over-tighten. Under-tightening may allow leaks; over-tightening deforms the ferrule and can make ferrule removal difficult. Compression ferrules are commonly not reused; plan to replace them when disassembling a joint.

How to remove a ferrule

First shut off the supply and relieve pressure. Stabilize the fitting body with one wrench while loosening the nut with a second. Back off the nut and remove the ferrule. If the ferrule is stuck, apply penetrating oil, use a ferrule puller, or carefully cut the ferrule off without nicking the pipe.

How to install a 3/8 Valve Adapter

For small lines like a 3/8″ valve connection, prepare the tubing the same way and follow the two-wrench technique. Most 3/8 Valve Adapter installation steps mirror larger fittings but require careful attention to torque guidance to avoid crushing the tube or the adapter threads.

Maintenance and inspection guidance

After bringing the system up to pressure, inspect joints for weeps and tighten slightly if needed. Add routine checks for corrosion and thermal fatigue, specially on refrigerant circuits. Avoid installing compression connections where vibration will loosen them over time.

Stage Task Tip
Prepare Prepare a clean, square, deburred pipe end Use proper cutting and deburring tools
Assemble Place nut and ferrule in order before fitting assembly Use pipe inserts on PEX/PVC to retain shape
Final Tightening Snug by hand before using two wrenches Use the maker’s torque recommendation
Leak Test Pressurize the system and look for weeps Look for slow weeps and re-torque slightly if safe
Ongoing Service Maintain regularly and replace used ferrules Stock spares from Installation Parts Supply for fast repairs

Summary

Selecting the proper compression fitting is essential for plumbing and HVAC work. The material choice, whether brass, copper, stainless steel, PVC, or PEX, must match the service type. That helps maintain reliability and extends system life. Proper parts and installation can significantly reduce energy losses and refrigerant leaks, preserving performance and environmental health.

Compression fittings create a leak-free, solder-free solution. They include a nut, ferrule, and body. To ensure a tight seal, follow these steps: square-cut and deburr the tubing, use the two-wrench technique, and replace ferrules when reused. These steps support long-lasting, leak-tight connections in various applications, from copper piping to instrumentation.

For particular installations, such as 3/8″ lines, 3/8 Compression Coupling, or 3/8 valve adapters, make sure you match size and pressure ratings to the task. Quality components from trusted suppliers are key. A guide from Installation Parts Supply can support in finding compatible fittings and adapters. Regular inspections and proper selection maintain system efficiency and compliance.

In summary, dedicating time to material selection and correct assembly is worthwhile. That helps ensure durable, leak-free connections. It supports optimal performance, fewer repairs, and less environmental harm.

Grounded Adapter for Medical Equipment: What You Need to Know

A grounding outlet adapter may be easy to overlook, yet it plays a vital role in protected electrical use at home, in offices, and while traveling. This guide covers benefits, installation, testing, sourcing, and compliance for consumers and B2B buyers in the United States. It clarifies when to use a grounding adapter or an outlet ground adapter and how a ground plug adapter or grounding adaptor plug differs from simple mechanical travel adaptors.

U.S. mains supply is 120V at 60Hz, and common plugs are Type A two flat parallel pins and Type B two flat parallel pins plus a grounding pin. A travel adaptor only changes the physical plug shape and does not convert voltage or frequency. By contrast, a voltage converter or transformer actually changes voltage and is limited by its amp or watt rating. Dual-voltage appliances labeled INPUT: 110–240V need only a travel adaptor for use in the U.S., while single-voltage devices outside that range require a transformer or converter.

This guide is designed for U.S. homeowners, travelers, IT professionals using high-efficiency GaN laptop chargers, and procurement or OEM teams that specify grounded adapters for product lines and travel kits. Across the guide, readers will find practical steps for choosing a dependable grounding adapter and checking outlet safety before using high-wattage devices.

Grounding Safety For High-Wattage Electrical Devices

Grounding helps stop stray electrical current from building up on metal housings, cases, and device chassis. A Grounding Outlet Adapter provides a low-resistance path back to earth. This path lets fault current to flow away from people and sensitive components. This lowers shock risk and keeps unwanted voltage from stressing insulation, which may otherwise lead to heat, arcing, or fire.

High-wattage chargers, such as modern GaN laptop adapters rated 65W to 240W, handle more energy and must manage small residual currents safely. A Grounded Adapter directs those stray currents to earth rather than allowing them to collect on a metal case. This approach reduces thermal buildup and minimizes the risk of insulation breakdown under heavy load.

Two-prong ungrounded plugs provide only live and neutral conductors. They can be suitable for many double-insulated products and low-power devices under 20W when used briefly. Yet, they pose a significant risk for permanent use with high-wattage equipment. Devices that draw higher power or use metal enclosures should use a Grounding Plug Adapter or a proper three-prong grounded connection.

Some users choose a Ground Lift Adapter to eliminate ground loops or hum in audio setups. Although it can help diagnose noise problems, it also disables the main grounding safety feature. Ground lift adapters should be used only as a temporary troubleshooting step, with full awareness that shock and fire risks are increased.

Grounding Adapters

Regulatory bodies such as UL, FCC, and CE mandate grounded designs for many high-power devices sold in the United States and abroad. Compliance is key for market access, warranty coverage, and insurance claims after loss. Using a three-prong Grounding Outlet Adapter on a circuit that is not truly grounded may affect warranty coverage and could influence homeowner insurance if a fault causes damage.

Long-term safety depends on upgrading two-slot outlets to properly grounded three-prong receptacles by a licensed electrician. This approach removes reliance on temporary fixes like cheater plugs or unapproved Grounding Adapters. It improves protection for both users and connected equipment.

  • How grounding prevents shock: sends fault current to earth rather than allowing it to pass through a person.
  • How grounding limits overheating: reduces voltage buildup that can stress insulation and increase heat.
  • When to choose a grounded solution: use one for laptops, GaN chargers rated 65W or higher, and other high-wattage equipment.

Grounding Outlet Adapter Types, Components, And Common Names

Manufacturers and suppliers often use different names for the same product. When shopping, search for terms such as Grounding Adapter, Ground Plug Adapter, and Grounding Adaptor Plug. You may also see names such as Ground Lift Adapter, Grounding Plug Adapter, Grounded Plug Adapter, Ground Adapter, Grounding Outlet Adapter, Grounded Adapter, and Outlet Ground Adapter.

Product labels are not always clear and can sometimes be misleading. A Ground Adapter for travel might just change pins without a true earth connection. On the other hand, a Grounded Plug Adapter suggests a dedicated earth conductor tied to the device’s chassis. The term Grounding Adaptor Plug is often used for items that restore a ground to older two-slot receptacles.

Physical plug standards matter because they affect fit, grounding, and user safety. Most U.S. homes use NEMA 5-15 style outlets in two-prong or three-prong versions. Travel products often refer to Type A and Type B plugs for North America. Europe commonly uses Schuko Type E/F, the United Kingdom uses BS 1363, and Australia/New Zealand use AS/NZS 3112. Choose an adapter that matches the local plug standard and ensures the earth path remains intact.

Electrical ratings define what the adapter can safely handle. Check voltage and current specs closely. Typical U.S. household equipment is often rated around 120V/15A. Higher-draw appliances and some chargers require 16A–20A ratings. Insulation class is also important. Class I devices depend on a protective earth. Class II devices are double-insulated and do not use a ground.

High-efficiency chargers using GaN or high-power supplies can run hot. Before using one with a 100W+ charger or heavy-load appliance, confirm the adapter’s current capacity and thermal rating. A Ground Plug Adapter rated too low can overheat and fail under sustained load.

Before use, inspect the adapter’s grounding features. A proper device will have a physical earth pin or grounding tab tied to the internal chassis or ground conductor. Test continuity from the earth pin to the ground lug if possible. Manufacturers such as Wecent and other ISO9001 factories publish grounding continuity and low-resistance thresholds for their grounded adapters.

Check Area What to check Why this matters
Labeling Terms such as Ground Adapter, Grounded Plug Adapter, Grounding Adaptor Plug, and Outlet Ground Adapter Similar names may hide different safety functions, so specifications matter more than labels
Plug type NEMA 5-15, Type A/B, Schuko E/F, BS 1363, AS/NZS 3112 Ensures mechanical fit and correct earth pin placement for local sockets
Voltage and amperage 120V/15A typical; 16A–20A for higher loads Mismatched ratings risk overheating or tripping protective devices
Device class Class I grounded vs Class II double-insulated Helps avoid using an ungrounded adapter with equipment that needs earth protection
Earth continuity Earth pin or grounding tab with low-resistance continuity Confirms the ground path will carry fault current to trip breakers
Thermal Rating Flame-retardant housing and sufficient conductor capacity Reduces the risk of melting, deformation, or internal failure

Before relying on any grounded accessory, perform simple specification and safety checks. A marked Grounded Plug Adapter or Outlet Ground Adapter is a good starting point. Confirm that the earth pin has continuity and that the voltage, amperage, and thermal ratings match the connected device.

Checking Outlet Grounding And Adapter Safety Before Use

Before connecting a high-draw device, complete a few quick checks to reduce safety risks. Simple tests can uncover wiring faults and help determine whether a Grounding Adapter or Grounding Outlet Adapter is appropriate. If you are uncertain about the result, stop and contact a licensed electrician.

How To Test For Proper Grounding

Use a receptacle tester to quickly assess wiring patterns. The tester lights indicate common faults like open ground, open neutral, or reversed hot/neutral. Always read the tester manufacturer’s legend so the light pattern is interpreted correctly.

Use a digital multimeter to confirm the tester’s findings. Measure voltage between hot and neutral, hot and ground, and neutral and ground. Use continuity mode to verify the path from the outlet ground pin or cover screw back to the panel ground or grounding conductor.

How To Inspect Circuit Capacity And Wiring

At the service panel, check the breaker amperage for the circuit you intend to use. Most modern circuits are 15A or 20A. Confirm that the breaker, outlet wiring gauge, and device load are properly matched.

Check for older wiring signs, including cloth-insulated conductors, knob-and-tube clues, or two-prong branch circuits. Homes with older 30A or 60A services and legacy wiring may require upgrades before safely supporting modern high-draw equipment.

Item to check How to check What it means
Continuity of ground path Check low-resistance continuity back to the panel ground Indicates the earth path may carry fault current safely
Multimeter readings Use a multimeter to compare hot-neutral, hot-ground, and neutral-ground readings Normal readings indicate correct wiring; abnormal readings signal faults
Breaker rating Panel label and breaker amp rating vs. device current draw Helps confirm whether the circuit can safely handle the load
Outlet condition Inspect for secure mounting, cracks, looseness, or heat marks Visible defects can indicate unsafe connections or overheating

When To Use Or Avoid A Three-Prong Adapter

A three-prong adapter or Grounding Adapter may be used temporarily only if the outlet box has been verified as grounded. Attach the grounding tab to the cover screw, then verify continuity back to the service panel ground before trusting the connection.

Do not use a Ground Lift Adapter or cheater plug as a permanent solution. Avoid three-prong adapters if the wiring is unknown, the cover screw has no ground continuity, or the circuit rating is too low for the device. In these situations, have the outlet upgraded or ask a licensed electrician to install a proper grounded receptacle.

Safe Use And Installation Best Practices For Grounding Adapters

Before installing a grounded adapter, conduct a careful inspection. Look for damage, loose screws, and visible wiring on the outlet. Also confirm that the breaker rating is suitable for the device load.

Correct Installation Steps For Three-Prong Adapters

To use a three-prong adapter on a two-slot outlet, attach the grounding tab or lug to the outlet cover screw. This ensures solid contact with the metal box. Tighten the screw to prevent movement. Next, verify continuity with a receptacle tester or multimeter to confirm the earth connection.

Make sure the adapter fits securely in the receptacle. A loose Grounding Adaptor Plug or Ground Plug Adapter can overheat. Only test the outlet under load after confirming continuity and breaker capacity.

How To Select The Correct Grounding Adapter

Ensure the adapter’s voltage and current rating match your appliance. High-wattage chargers, like GaN models rated 65W and above, need a Grounded Adapter. Devices consuming 100W or more require grounded designs and must comply with CE or FCC rules.

Choose UL-listed, CE-marked, or RoHS-compliant products to reduce risk. For travel, select adapters rated for the destination voltage and fitted with a proper ground pin where needed. If your device requires earth protection, avoid universal travel adapters that do not provide a true Outlet Ground Adapter function.

When To Get Professional Electrical Help

If tests reveal uncertain grounding, old or cloth-insulated wiring, or false-positive tester results, hire a licensed electrician. A licensed electrician is needed for proper three-prong outlet upgrades, new grounding conductors, or dedicated circuits for heavy appliances.

Seek immediate professional help for outlet discoloration, burning smells, or persistent loose connections. Document any professional repairs and use certified Grounding Outlet Adapter products. Documentation and certified products can help protect warranties and support insurance requirements.

Sourcing And Specifying Grounded Adapters For Travel, Home, And B2B Use

Start by reviewing the application and the power needs of each connected device. For laptops and high-power chargers, choose a Ground Adapter that has a true earth pin. Ensure the adapter supports a voltage range of 100–240V for travel. The current capacity should match your home’s circuits and the power needs of your appliances, often 15A, but sometimes 16A–20A for more demanding devices.

Check the Grounding Plug Adapter for clear safety and compliance marks. Marks such as UL, CE, RoHS, and FCC indicate compliance support for U.S. use and export markets. For specific markets, add PSE for Japan, KC for Korea, and CCC for China to the list of certifications.

Look beyond the safety logos and examine the technical specifications. A Grounded Plug Adapter datasheet should list maximum voltage, continuous current, and temperature rating. Request millimeter drawings and pin measurements to confirm compatibility with outlet types such as Type A/B, Schuko, and BS1363.

When purchasing, demand evidence of testing. Suppliers should provide 100% functional test reports and batch traceability. Add grounding continuity thresholds and acceptance criteria to the purchase order so production issues are caught early.

For B2B sourcing, prioritize manufacturers with ISO9001 systems and in-house testing capabilities. A clear statement about per-unit testing, simultaneous multi-certification support, and compliance across EU, U.S., and Asia-Pacific reduces product liability and speeds market entry.

Consider cost and lead time when purchasing Grounding Adapters. Grounded designs may carry a 5–10% OEM premium because of earth-pin engineering and certification costs. Typical white-label SKUs may begin around a 200-piece MOQ with a 6–8 week lead time. More customization usually increases MOQ and lengthens delivery schedules.

For high-power applications, specify at least a 16A rating when appropriate. Add requirements for flame retardant housing, screw torque for terminals, and solder or crimp quality checks. Require engineering change control clauses so validation methods are locked before mass production.

Consumers should favor grounded models when comparing adapters. A Grounding Adaptor Plug with UL certification and a clear voltage range is safer than an unlabeled travel adapter. Remember that travel adapters do not convert voltage, so use them only when the device supports the destination voltage.

For procurement teams, map suppliers by capability: design for manufacturability, certification lab partners, and in-line testing capacity. Negotiate sample runs to test Grounding Plug Adapter performance under real loads and confirm traceable batch or serial IDs for recalls and warranty support.

Below is a compact comparison to guide buying decisions for typical scenarios.

Use Case Recommended Minimum Rating Key Certification Buying Notes
Travel chargers laptops, phones 100–240V, 2.5–3A per USB port; 15A for full outlet CE, FCC, and UL certification where applicable Make sure the plug fits and that grounding is actually provided
Home power strips and power stations 100–240V with 15A to 20A continuous rating UL and RoHS where applicable Look for surge rating, thermal rating, and grounded construction
Bulk OEM supply 100–240V, minimum 16A; product-specific specs ISO9001 plus CE, UL, PSE, KC, or CCC as markets require Require 100% testing, batch traceability, and engineering validation
Installer-grade parts and accessories Match device and circuit amperage, commonly 15A to 20A UL listing plus supplier test reports Use suppliers that document certifications and installation accessories

Select sellers that provide complete datasheets and test reports. Retailers and distributors who provide clear certification details make it easier to verify a Ground Adapter before purchase. For installers who need related parts and accessories, consult specialty suppliers that list outlet hardware and testing tools.

Grounding Outlet Adapter Summary

Choosing the right Grounding Outlet Adapter is critical for safety and the longevity of your devices. A grounded adapter creates a clear path for fault currents, reducing the risk of shock and fire, which is essential for high-wattage equipment. Before using a Grounding Adapter or Ground Plug Adapter, check both outlet grounding and circuit capacity. Use a receptacle tester or digital multimeter to perform those checks.

To reduce risk, do not use cheater plugs on ungrounded circuits. If you need a long-term grounded solution, have a licensed electrician upgrade two-slot outlets to three-prong grounded receptacles. When traveling or using high-power chargers such as GaN 65W+ units, choose a certified Grounded Adapter or Grounding Outlet Adapter. Look for CE, UL, FCC, and RoHS marks where applicable. Also, insist on functional testing for bulk B2B purchases.

Properly grounded designs may cost 5–10% more, but they can reduce liability and improve access to regulated markets. If you suspect ungrounded outlets, it is wise to schedule an electrician inspection. Always purchase UL/CE-certified Ground Plug Adapter products when needed. Before traveling, confirm that your devices are compatible with the local voltage. Use a transformer for appliances that do not support dual-voltage.

For tools, parts, and professional-grade accessories to install or verify grounding, rely on reputable suppliers. Reliable suppliers should list outlet accessories, grounding hardware, and testing equipment. Following these guidelines helps ensure safer use of Outlet Ground Adapter products while supporting electrical system reliability and compliance.

Understanding the Internal O Ring Mechanism in Modern Angle Stop Designs

An angle stop is a space-saving, L-shaped shutoff valve where a water line feeds a fixture. These valves are commonly installed beneath sinks, behind toilets, and near appliance hookups. A functioning Plumbing Angle Stop lets you isolate one fixture without shutting off the main supply. That means fixture swaps can be completed more easily.


In many homes, angle stops measure about 3–6 inches and redirect water at a 90-degree angle toward the fixture. Today’s installations often use quarter-turn, ball-style Angle Stop Valve models. They are quicker to operate and commonly provide longer service life. When an angle stop becomes corroded, replacement can limit water-damage risk and make future service easier.
What Is An Angle Stop

Main Takeaways

  • Plumbing Angle Stops let you shut off water to one fixture without touching the house main.
  • Angle Stops Plumbing are usually found beneath sinks, behind toilets, and near fixtures where quick access matters.
  • Most Angle Stop Valve units are compact, often 3–6 inches tall, and redirect water at a right angle.
  • Quarter-turn models are commonly preferred because they shut off faster.
  • Replace valves that leak, corrode, or become difficult to operate to avoid water damage.

What Is An Angle Stop And Why It Matters

The angle stop is a compact shutoff valve installed where a water line meets a fixture. It controls flow to one fixture, allowing repairs or replacements without shutting off the main supply. Homeowners, plumbers, and building inspectors rely on it to keep repairs quick and contained.

Definition And Simple Explanation

An angle stop is a 90-degree valve placed at the fixture supply. Angle Stop Valves come in several styles, including older multi-turn stem designs and newer quarter-turn ball designs. The Plumbing Angle Stop fits neatly under sinks and behind toilets while saving space.

Common Angle Stop Locations In A Home

Plumbing Angle Stops are most often installed below bathroom vanities and kitchen sinks. They sit at the back of cabinets where the supply line enters. Toilet angle stops are normally mounted on the wall behind or beside the toilet tank. You will also see angle stops at appliance connections such as dishwashers, ice makers, washing machines, and near some water heaters for cold-water shutoff.

Homeowner Benefits Of Angle Stops

A major advantage of an Angle Valve For Sink is fixture isolation. A working Plumbing Angle Stop lets you shut off one fixture to replace a faucet or repair a leak. This keeps small leaks from turning into major water damage and limits disruption during repairs.

Convenience is another key benefit. Angle Stops Plumbing are compact, helping reduce repair time and inconvenience. Turning the valve periodically helps keep it from sticking. Upgrading old multi-turn stops to modern quarter-turn Angle Stop Valve models speeds emergency responses and lowers stress.

How An Angle Stop Differs From An Angle Seat Valve

Household angle stops serve low-pressure potable water lines. They are designed for sinks, toilets, and common appliances. The industrial Angle Seat Valve is different. It handles high-pressure, high-temperature, or corrosive media found in steam, chemical, and HVAC systems. Angle seat valves use metal seats and pistons for durability in demanding environments, while an Angle Stop is a simple residential fixture shutoff.

How To Choose From Different Types Of Angle Stops

Choosing the right angle stop for a home project means considering material, operation, connection type, and special features. The following overview helps homeowners and plumbers choose Plumbing Angle Stops that are code-conscious.

Materials

Brass is widely used as the standard material for Angle Stops. Because it resists corrosion and may last 10–20 years, brass is a strong choice for Quarter-Turn Angle Stops. Stainless steel bodies are best for humid basements, coastal areas, and outdoor hose bibs to prevent rust. Plastic-bodied stops are cheaper, but they are typically less durable and can degrade in hot-water service. For potable water lines in the United States, select a Lead-Free Angle Stop that meets applicable federal and state requirements.

Operation Styles

Quarter-turn valves use a ball or disc and open with a 90-degree turn. They offer fast shutoff and better resistance to mineral buildup, which makes them useful for frequent operation and emergencies. Multi-turn valves rely on a rising stem and need several turns to open or close fully. They provide finer flow control but are more likely to leak or stick in older homes.

Angle Stop Connection Types

Compression Angle Stop fittings join with a nut and ferrule and suit copper or CPVC stub-outs. They are popular in remodels because they can be installed without soldering or open flame. Sweat Angle Stop joints are soldered for a slim, permanent seal and work well in tight spaces where a torch is acceptable. FIP-threaded valves attach to male adapters and usually require PTFE tape or pipe-thread sealant. Push-Fit Angle Stop models, including SharkBite-style options, can slide onto copper, CPVC, or PEX without special tools. Push-fit designs are handy for DIY jobs and cramped spaces, while Compression Angle Stop fittings are common where future removal or rework may be needed.

Useful Special Features

Some Angle Stop Valve designs include a built-in Water Hammer Arrestor Angle Stop. These use a piston or air chamber to absorb shock from quick-closing fixtures and reduce noisy banging. For coastal or humid environments, choose a Coastal Angle Stop with corrosion-resistant finishes, stainless internals, and anti-seize stems. A Lead-Free Angle Stop marking on the body helps confirm the valve is intended for potable-water use. Select a model that matches your pipe type and service expectations to avoid premature failure.

Plumbing Angle Stops

Plumbing angle stops manage fixture water flow using a compact right-angle layout. The choice of size and style affects both function and code compliance. Below, we cover common markings, placement, potable-water standards, and modern standardization trends.

Common Valve Sizes And How To Read Markings

In homes, inlet fittings are usually 1/2 inch nominal, while fixture outlets are often 3/8 inch compression. Valve labels may show a format like 1/2 x 3/8 or 1/2” MIP x 3/8” OD. This identifies the inlet and outlet sizes. Some labels specify 3/8 COMP for compression outlets. Make sure the inlet matches your supply pipe, whether it is 1/2 FIP, 1/2 MIP, or 1/2 sweat.

Common Home Placement

Angle stops are commonly found under kitchen and bathroom sinks and behind toilets. They are also used for appliances such as water heaters, dishwashers, ice makers, and washing machines. Under-sink stops usually sit at the back of cabinets, while toilet stops remain visible behind the tank.

Lead-Free Code Notes For Drinking Water

In the United States, valves used on drinking-water lines must comply with lead-free requirements for wetted surfaces. Look for a Lead-Free Angle Stop with compliant markings and documentation. Contractors should follow local plumbing codes and provide the appropriate certifications, testing information, and warranty support.

Modern Trends And Recommended Standards

Modern Angle Stops often use quarter-turn ball designs. A Quarter-Turn Angle Stop provides fast shutoff in emergencies and, when made from brass, can offer long service life. Many plumbers standardize on brass 1/2 x 3/8 angle stops for sinks and toilets because they simplify stocking, replacement, and maintenance. Models with arrestors and other potable-water protection features are increasingly common in new installations.

Practical Checklist For Selection

  • Check Valve Markings before buying so the inlet type and outlet size match your system.
  • Make sure the Angle Valve For Sink or toilet stop matches the supply hose, fixture threads, and tank connection.
  • Specify a Lead-Free Angle Stop when the line serves potable water.
  • For many homes, standardizing on Quarter-Turn Angle Stop 1/2 x 3/8 valves can simplify maintenance and improve reliability.

Installing And Replacing Angle Stops With Tools Steps And Best Practices

Before working on a plumbing angle stop, decide whether the main water supply needs to be shut off. The main usually needs to be closed only when the existing stop is frozen. For most replacements, you can isolate the line using the valve under the sink. Always relieve pressure by opening a downstream faucet, and keep towels plus a bucket nearby.

Before the repair begins, collect the necessary tools, fittings, and supplies. Common tools include an adjustable wrench, a backup wrench, a tube cutter, and a deburring tool. Emery cloth, PTFE tape, a marker, and a flashlight are also helpful for clean preparation and inspection. For push-fit work, use the manufacturer’s push-fit angle stop and a PEX stiffener where needed; for compression jobs, keep spare ferrules and nuts available. Penetrating oil and a heat shield help with stubborn fittings and sweat connections.

Tool Checklist:

  • Adjustable wrench plus backup wrench
  • Pipe cutter and deburring tool
  • PTFE tape and marker
  • Push-fit stop with PEX stiffener
  • Extra ferrules, nuts, oil, towels, and cleanup supplies

Each connection type requires its own installation method. For compression, slide the nut and ferrule onto the pipe, then seat the valve against the pipe shoulder. Hand-tighten the nut and finish with a 1/4–1/2 turn using a wrench. When tightening the outlet nut, use a backup wrench to prevent twisting the stub-out.

For push-fit installation, cut the pipe square and deburr it. Mark the insertion depth, then push the valve straight onto the pipe until it reaches the mark. Tug lightly to confirm the fitting locked. Push-fit angle stop fittings can work with copper, CPVC, and PEX, but PEX may require a stiffener depending on the product.

Sweat angle stop joints require careful handling. Remove or protect seals, clean and flux the pipe and valve cup, heat evenly, and apply solder properly. Once the joint cools, wipe away flux residue and inspect the solder bead. Use a heat shield or remove seals to prevent damage during sweating.

For a FIP angle stop or other threaded connection, apply three to four wraps of PTFE tape to the male threads and start the valve by hand to prevent cross-threading. Tighten until aligned and sealed, then connect the supply line and test slowly.

Test the work by turning water on slowly and watching the joints. Open the angle stop and fixture gradually. Use a dry towel or tissue to reveal small weeps around fittings. Exercise the valve and recheck after pressure stabilizes to catch slow leaks.

Be aware of common mistakes that can lead to failures. Over-tightened compression nuts may deform ferrules and create leaks. Do not reuse damaged ferrules; when necessary, cut back the pipe and install a new ferrule. Avoid sweating valves without protecting seals or removing internal parts. Avoid twisting push-fit valves during insertion and always follow the manufacturer’s insertion-depth marks.

Typical problems include frozen or leaking stops that require main shutoff, incorrectly applied PTFE tape on threaded joints, and outlet nuts tightened without a backup wrench. Keeping spare parts available and following proper tightening guidance helps reduce repeat repairs.

Common Angle Stop Issues And Fast Fixes

Homeowners often encounter small leaks and frozen handles with angle stops. A quick inspection can show whether the valve needs a minor repair or complete replacement for dependable service.

Leaks Around The Handle

Stem seepage in older multi-turn valves often comes from a loose packing nut. Tightening the nut about 1/8 turn with an adjustable wrench can often solve the issue. If the leak continues, the internal washer or O-ring may be worn and replacement may be required.

Stuck Valves

Mineral Buildup, corrosion, and rust commonly cause stuck angle stops. Applying a penetrating oil such as WD-40 and allowing it to sit for about ten minutes can sometimes loosen the valve. Gently rocking the handle back and forth may free the valve. If it remains stuck or the handle is brittle, replace the stop to avoid a flood.

Compression Joint Weeps

A persistent leak from a compression joint usually indicates a misaligned ferrule or damaged pipe end. To fix it, loosen the nut, reseat the ferrule, and clean the pipe with emery cloth. If the ferrule is worn, cut back the pipe, install a new ferrule, and tighten carefully to prevent more leaks.

When Replacement Makes Sense

Homes with frequent leaks, frozen handles, visible corrosion, or valves over ten years old should consider modern angle stops. A Quarter-Turn Upgrade to a ball-style valve can improve shutoff speed, resist Mineral Buildup, and make emergency service more dependable.

Simple Troubleshooting Checklist

  • Tighten the packing nut slightly for stem drips.
  • Use Penetrating Oil and gentle motion for stuck valves.
  • Reseat the ferrule or cut back the pipe for compression leaks.
  • Upgrade to quarter-turn stops when valves freeze or leak repeatedly.

Regularly exercising angle stops and checking for corrosion helps identify issues early. Fixing leaks, stuck valves, and weeping joints promptly helps prevent bigger repairs and supports Angle Stop Reliability.

Summary

This Plumbing Angle Stops Guide shows why small fixture shutoff valves are so important. They allow homeowners to isolate specific fixtures without affecting the entire system. Selecting the proper material, valve operation, and connection style makes future repair work simpler. It can also lower the chance of water damage during fixture upgrades and maintenance.

For strong everyday performance, many professionals prefer lead-free, quarter-turn brass 1/2 x 3/8 stops. Integrated arrestors may be added where quick-closing fixtures or water hammer create noise and stress. Homeowners should test valves regularly and replace faulty Plumbing Angle Stops. Parts may cost $6 to $60, while professional installation can range from $75 to $200 depending on location and complexity.

When installation feels uncertain, hiring a licensed plumber is the safer option. A plumber can ensure code compliance and provide warranty-backed work. That approach helps protect fixtures, reduce risk, and make future maintenance easier. It also follows best practices in Angle Stops Plumbing for modern residential installations.

Hose With Lock: What to Look for Before You Buy

Outdoor faucets can be highly practical, but they are also at risk when left unsecured. This guide breaks down how Water Hose Locks and matching hardware help lock down spigots, stop unauthorized use, and reduce wasted water. It sets out practical solutions for homeowners, businesses, and institutions across the United States. These measures are especially valuable in drought-prone regions where Lock Water Hose solutions are becoming more common.

This article compares several solutions, including Hose Lock styles, Water Faucet With Lock designs, and vandal-resistant boxes such as the AA-HB-100 stainless steel model. It also covers lever-handle and quarter-turn faucet locks, as well as keyed or combination Lock For Water Spigot options. Readers will learn how to choose a suitable lock, handle basic installation, and maintain the hardware over time.

Installation Parts Supply (https://installationpartssupply.com) is featured as a trusted online source for faucet locks, lock boxes, and compatible parts. It serves both homeowners and plumbing professionals. Using these locks can help prevent theft, lower utility costs, reduce water waste, deter vandalism, and increase property security.

Why Outdoor Faucet Security Is Important For Homeowners And Businesses

Although outdoor faucets seem simple, they can lead to major problems when left unsecured. An unlocked spigot can lose water, increase utility bills, and allow unauthorized access to private water lines. Installing a Locking Hose Bib or a Hose Bibb Lock limits these risks and safeguards property value.

In water-scarce states such as California, unauthorized water use has become an increasing concern. Reports of unauthorized taps into hydrants, municipal stations, and residential spigots have increased. A Lockable Hose Bibb or a Lock For Water Spout serves as a clear warning, discouraging casual misuse and preventing hefty meter charges.

Unsecured spigots can lead to problems beyond expensive water bills. They can trigger flooding, landscape erosion, foundation seepage, and basement damage. By installing a Lock For Water Faucet or a Hose Bibb Lock, the risk of costly repairs and insurance claims or legal liabilities is substantially minimized.

Communities under water restrictions depend on compliance to manage limited supplies. Securing private taps with Locking Hose Bibs and lockable enclosure boxes supports water conservation. Municipalities can manage water rules more effectively, while neighbors benefit when outdoor outlets stay secured during drought periods.

When choosing a Locking Hose Bib or similar device, it is wise to consider site needs, faucet type, and local rules. Buying a quality Lock For Water Spout or Lock For Water Faucet is a practical step that helps secure assets, conserve water, and support community goals.

Water Hose Lock Types And How They Work

Choosing the right device for a lockable water spigot depends on faucet style, usage needs, and desired security. Below are frequently used options, how each one works, and the settings where each fits best.

Locking Hose Bib

Cap Locks And Hose Bibb Locks

Hose bibb locks usually feature a metal cap or sleeve that slides over the spigot opening and locks into place. The cover covers the hose threads, stopping hose attachment and preventing the water from being turned on.

These caps are often weather-resistant and affordable. They fit standard garden hose thread sizes and work well on round-handle spigots at homes and small businesses. For basic theft prevention, a hose with lock or spicket lock cap is a cost-effective solution.

Enclosure Box Locks And Vandal-Proof Lock Boxes

Enclosure boxes cover the faucet and bibb inside a lockable metal or plastic housing. The box limits access to both the handle and hose connection, providing strong protection in public, commercial, or industrial locations.

Options like heavy-duty stainless lock boxes are rated for cutting resistance and long life. These boxes work with padlocks or integrated cylinders and are preferred where a visible deterrent and maximum theft resistance are required for locks for hose bibs.

Lever Handle And Quarter-Turn Faucet Locks

Lever and quarter-turn locks fit over modern handle shapes and stop the handle from rotating. They secure around the lever so the valve cannot open until the lock is removed.

These locks work with newer fittings with flat or lever-style handles. They do not fit classic round spigots. A Flow Lock that secures the handle can be an effective option for properties with modern faucets.

Keyed, Combination, And Padlock Locking Options

Locking mechanisms may use keyed cylinders, combination dials, and standard padlocks paired with shrouds. Keyed locks deliver strong security but need key control. Combination locks enable shared access without key management.

Many lock sleeves and enclosures are padlock-ready and include hardened shrouds that help resist cutting. Choosing between a keyed spicket lock and a combination-style hose with lock depends on how often access is needed and who needs it.

Device Type Ideal for Usual materials Typical security
Hose bibb cap lock Residential round-handle spigots Weather-resistant brass, zinc, or stainless Light to moderate
Enclosure box vandal-proof Public, commercial, institutional faucets Heavy stainless steel or durable polymer High
Handle clamp lock Updated faucets with lever handles Metal or reinforced plastic materials Medium-high
Keyed, combination, padlock Shared-use locations and varied properties Steel shackles and brass cylinders Medium-high protection

Choosing The Right Lockable Solution For Your Faucet

Selecting the right lock requires faucet style, location, climate, and budget. A properly matched lock controls outdoor water access while keeping normal authorized use practical. It also reduces trial and error, saving time and effort.

Choose a lock that fits the faucet style

For round-handle hose bibbs, cap-style Lock For Hose models that slide over the valve are usually best. Quarter-turn and lever-handle spigots require clamp-style Locking Hose Bib fittings, designed for those handle shapes. Freeze-proof spigots require lock designs that can fit inside insulated covers or attach behind the spout.

Evaluating site risk and security needs

In low-risk yards, an inexpensive cap or keyed Lock For Water Spout between $10 and $25 is often sufficient. For high-traffic or commercial sites, heavy-duty options like stainless steel Garden Hose Lock Box enclosures are necessary. Consider visibility, ease of access, and vandalism risk when determining the strength needed.

Climate and freeze protection considerations

In cold climates, choose locks compatible with insulated covers or select freeze-proof Lock For Hose products. These are designed to stay installed through winter. If lines must be drained for the season, remove the locking device before winter to avoid corrosion and cracking.

Budget and maintenance factors

Basic cap locks are usually the most affordable option. Enclosure boxes cost more upfront, but stainless steel versions often provide longer service life. Consider the long-term savings from preventing water loss and unauthorized use. Choose corrosion-resistant finishes and plan routine lubrication so the lock continues to operate smoothly.

Outdoor Tap Type Best Lock Option Usual Price Best Use
Round-handle hose bibb Cap-style Lock For Hose or keyed cap About $10–$25 Residential yards, low-risk areas
Lever or quarter-turn spigot Lever-specific clamp Locking Hose Bib or padlock-ready shroud Usually $20 to $60 Moderate-security homes and updated faucets
Public/commercial faucet Stainless lock box or vandal-resistant enclosure About $75–$250 Parks, businesses, high-risk locations
Freeze-proof spigot Winter-safe lock or removable protective design About $25–$100 Outdoor faucets in freezing climates

Installation And Step-By-Step Locking Process

To install a lock for your water faucet, follow these steps carefully. Ensure the device fits snugly and functions as expected. Begin with a dry faucet and verify the threads and handle type. Remove hoses, clear away debris, and clean the mounting surface before installation.

Preparing Your Outdoor Faucet For A Lock

First, shut off the water supply and open the faucet to drain any remaining water. Dry the spicket to prevent slipping when installing the spicket lock. Check the threads for wear and the handle style to select the appropriate Lock For Water Faucet or Locking Hose Bib.

Fitting The Inner Sleeve And Securing The Lock Body

Many Lock For Water Spout products include an inner sleeve that lines up with faucet threads, grooves, or spout shape. Slide the sleeve over the spigot and ensure it is flush. Then hand-tighten the lock body over the sleeve. Do not over-tighten, because excess force can damage threads and cause early wear.

Securing With Padlocks Or Integrated Locking Mechanisms

For padlock-ready enclosures, slide the outer cover into place and align the shroud correctly. Insert a hardened padlock through the opening and secure it. For keyed or integrated units, follow the manufacturer’s instructions to engage the mechanism. Test the security by attempting to open the faucet with moderate force.

Common Installation Pitfalls And Troubleshooting

Misaligned inner fittings can cause wobble or loosening. If this occurs, re-seat the sleeve and re-tighten by hand. Confirm that the Locking Hose Bib is compatible with your faucet type to improve security and fit.

Rust, mineral build-up, or debris can block the fit and lock action. Clean the threads and apply a light lubricant rated for outdoor use. In freezing regions, drain water from lock cavities and consider insulated or removable designs to prevent cracking or damage.

Step What To Do Helpful Tip
1 Turn off water supply and wipe spigot dry Open the faucet to drain leftover water, then wipe dry
2 Check threads and handle style Choose the Lock For Water Faucet style that matches the handle
3 Fit inner sleeve Make the sleeve flush and do not force it
Fourth Install lock body Hand-tighten only enough to secure the lock
Step 5 Engage padlock or integrated lock Use a hardened padlock for exposed spicket lock enclosures
6 Test and troubleshoot Check for wobble, leaks, or freeze-related issues and correct as needed

Hose Lock Maintenance, Care, And Seasonal Upkeep

Regular care is important to ensure locks remain reliable and last longer. It is recommended to inspect a Hose Lock or Flow Lock at least twice a year. Look for signs of rust, grit, or damaged threads that could jam the mechanisms. Use a dry cloth to wipe the exteriors and remove debris from moving parts.

Apply a graphite-based lubricant to the lock cylinders and pivot points. Opt for light lubricants recommended by the manufacturer for stainless components. Avoid heavy oils because they can attract dirt and grit. Inspect screws, fittings, and padlock shackles for wear. Tighten loose fasteners and replace worn hardware promptly.

Start spring maintenance by testing each lock after thawing. Make sure keys, cylinders, and combinations work smoothly. For busy months, verify that repeated use does not loosen fittings. Inspect seals and gaskets on a Lockable Hose Bibb or Garden Hose Lock Box to prevent leaks and corrosion.

During summer, check sun-exposed plastic enclosures for UV damage. UV can weaken materials, so replace any faded or brittle parts. For commercial sites, document inspections for compliance and liability management. A Flow Lock that sticks or binds under frequent use may need cleaning, service, or replacement.

Prepare for cooler months by pairing locks with insulated covers or selecting freeze-proof options. Drain hoses and exposed lines before temperatures drop. If ice could damage the mechanism, remove the lock or protect it to prevent cracking, binding, or shroud damage.

Follow the manufacturer’s care instructions for stainless hardware and warranty requirements. For example, use specification sheets such as AA-HB-100 when available. Proper maintenance supports Locks For Hose Bibs and Lockable Hose Bibb systems meet their expected lifespan and warranty conditions.

Long-Term Durability: Product And Material Comparisons

The lock solution you choose affects security, upkeep, and total cost. This guide examines common materials and styles to match performance with site needs. It features heavy-duty options and lighter choices for homes.

Stainless steel cases withstand tampering and corrosion well. A 12-gauge Stainless Steel Lock Box is often ideal for outdoor use in public, institutional, and industrial areas. Look for vendor specs on warranty terms and country of manufacture for commercial models.

Plastic Enclosure units are more affordable and can resist some chemical corrosion. They are lighter and easier to install around a Hose Bibb Lock on private property. They do not match stainless steel in forced-entry resistance, making them suitable for lower-risk homes.

Stainless Steel Lock Boxes Vs. Plastic Enclosures

Opt for stainless steel in high-risk areas facing vandalism or heavy use. Choose plastic when lower cost, lighter weight, or certain chemical-resistance needs matter more. Before deciding, consider expected lifespan, warranty coverage, weather exposure, and local climate.

Padlock Compatibility And Shroud Fit

Many lock boxes include a Padlock Ready Shroud designed for shrouded or shackle-less padlocks. This design reduces exposed shackle length and improves cut resistance. For better protection, use hardened steel padlocks or shroud-compatible locks.

Check product specifications for clearance, shroud dimensions, and padlock compatibility. Keyed cylinders from reputable brands resist picking better than generic locks. Whenever possible, test fit the lock and padlock before final installation.

Where To Buy Reliable Faucet Locks

Installation Parts Supply carries a variety of faucet security hardware for homeowners, plumbers, and property professionals. Retail home centers and online marketplaces sell basic Hose Bibb Lock models for homes. For heavy-duty stainless options, check manufacturer-direct sources and industrial suppliers for detailed specifications, warranty information, and samples.

Feature Stainless Lock Box Plastic Lock Enclosure Shrouded Padlock Feature Where To Purchase Faucet Locks
Security level High protection against cutting and prying Weather-resistant but lower physical strength Boosts security by shielding padlock shackles Installation Parts Supply, manufacturer-direct sellers, and industrial suppliers
Corrosion resistance Excellent; long-term outdoor durability Resists moisture but may degrade under UV over time Varies by material and coating Home centers for basic locks and specialty vendors for commercial units
Budget impact More expensive initially but often longer-lasting Lower upfront cost; may need replacement sooner Adds cost while improving security Varies by channel; compare warranties and specs
Recommended application Public-facing, industrial, and institutional faucets Home yards and low-risk areas Sites where exposed shackles are a concern Choose retail, online, or industrial sources based on security level

Water Faucet Lock Cost, Warranty, And Value

When selecting a Lock For Water Faucet, it is necessary to consider both the initial cost and long-term benefits. The price of a Hose Lock differs based on its design, material, and purpose. Understanding Hose Lock Price and Warranty For Faucet Lock details helps balance cost, security, and durability.

Hose Lock prices start low for basic cap designs and rise for heavier-duty options. Cap and cap-style locks commonly cost about $10 to $25. Lever-handle clamps fall into a similar or slightly higher price range. On the other hand, commercial-grade stainless steel enclosure boxes and vandal-proof units are pricier due to their thicker steel and tamper-resistant features.

The real value of a Locking Hose Bib goes beyond its purchase price. It can reduce water theft, saving owners hundreds to thousands of dollars. A quality Flow Lock or stainless enclosure can also reduce vandalism repairs and lower utility costs.

Warranty coverage is important when comparing brands and product grades. Choose manufacturers that provide detailed specification sheets and care instructions. Some 12-gauge stainless models may include vandalism warranties lasting close to a decade. Requesting samples and reading warranty guides before purchase helps confirm compatibility with your local environment.

Reputable suppliers such as Installation Parts Supply and major hardware retailers often provide product details and replacement parts. Confirming warranty terms and maintenance requirements helps ensure that routine care maintains coverage and extends the product’s life.

Value extends past the initial cost, including water conservation and reduced risk. A well-chosen Lock For Water Faucet supports water stewardship during droughts and shows that the property is secured. These non-monetary benefits—such as peace of mind, reduced anxiety about unauthorized use, and compliance with local regulations—add significant value.

The decision should balance Hose Lock Price, expected savings from avoided water loss, and the long-term benefits of a Locking Hose Bib. A thoughtful purchase balances budget, Warranty For Faucet Lock terms, and the protection level needed from a Flow Lock or similar device.

Final Thoughts

Installing the right Water Hose Locks is a straightforward step that secures outdoor water access, reduces theft, and prevents costly water waste and property damage. Whether you choose a basic Lock For Hose cap, a lever-handle lock, or a heavy-duty Lockable Water Spigot enclosure, a proper fit protects fixtures and supports broader neighborhood water-conservation goals.

Before choosing a solution, assess faucet style, local risk, climate, and usage needs. For everyday use, a well-fitted Garden Hose Lock Box or keyed bibb cap provides effective deterrence. For high-risk locations, consider a strong 12-gauge stainless enclosure such as the AA-HB-100 for maximum durability and protection.

Take the next practical step by sourcing locks and accessories from reputable suppliers. Review product specification sheets and warranties, and follow manufacturer guidelines for installation and seasonal upkeep. Understanding How To Lock Outdoor Water Faucet properly and maintaining the hardware helps extend service life and preserve performance.

A modest investment in a lock system delivers savings through lower utility bills, fewer repair surprises, and compliance during drought restrictions. Secure fixtures with the right tools and routine care to keep outdoor water accessible only to authorized users and give property owners lasting peace of mind.

Why a Drip Tray With Drain Is a Must for Soda Fountains

Boost your bar’s efficiency with a top-tier beer drip tray featuring a drain. This smart addition captures drips from taps, safeguarding countertops and kegerator surfaces from spills. It streamlines daily cleaning for busy establishments across the United States.

Visit website of Beer Drip Tray With Drain
The selection includes countertop, surface-mount, wall-mount, flush-mount, and wrap-around trays for multi-tap towers. Opt for stainless steel for durability and resistance to corrosion, or pick cost-effective alternatives when necessary.

These trays are designed to work seamlessly with glass rinsers and feature reliable drain components. You’ll get well-chilled, beer-clean glassware and dependable drainage. Easy-to-clean features like removable grates and welded corners ensure maintenance is a breeze. This is ideal for brewpubs and serious home kegerators.

Why A Beer Drip Tray With Drain Is Important For Bars

Busy bars and taprooms depend on small details for smooth operations. A quality drip tray for beer keeps counters dry, reduces sticky buildup, and shortens sanitation time. The right bar drip tray with drain transforms a messy spill into a controlled waste flow. This allows staff to focus more on serving and less on cleaning.

Maintain Cleanliness And Reduce Slip Hazards

Drip trays catch overflow and stray drips, preventing them from pooling on surfaces and floors. By draining liquids away from walkways, cleanup becomes quicker and slip risks decrease during busy times. Easy-to-clean designs and removable grates make sanitation faster, allowing teams to adhere to health codes without disrupting service.

Countertop Drip Tray With Drain

Protect Counters And Kegerator Equipment Against Spills And Corrosion

Moisture can stain or corrode countertops and kegerator casings. A kegerator drip tray with a reliable drain directs beer and rinse water away from sensitive components. This protection extends the life of stainless steel towers, wooden bars, and keg collars, saving on repair costs.

Improve Guest Experience With Cleaner Pour Areas And Glass Rinsers

Customers appreciate a clean pour station. A well-placed beer tap drip tray creates a neat presentation and pairs well with integrated glass rinsers for chilled, clean glassware. Bars using wrap-around or tower drip trays maintain consistent pours and fewer off-flavor complaints, boosting reviews and repeat visits.

Small venues and home setups also benefit. Compact countertop drip tray solutions fit under single taps on kegerators, while wrap-around options suit commercial tap walls. Matching the tray type to traffic levels keeps operations efficient and guest impressions positive.

Beer Drip Tray Types: Countertop, Surface Mount, Wall Mount, And Flush-Mount

Choosing the right drip tray can significantly reduce cleanup time and protect your bar from spills. There are various options available, each catering to different needs and budgets. Whether you’re setting up a home kegerator or managing a busy commercial tap wall, there’s a style that fits your requirements.

Countertop Drip Tray With Drain Options For Commercial Bars And Home Kegerators

These countertop trays range from compact pads for a single tap to wider pans for multi-tap towers. They often feature removable grates and brass drains for efficient drainage and easy cleaning. These trays are perfect for those who prefer minimal installation and flexible placement, whether at home or in a small bar.

Surface Mount Drip Tray With Drain For Easy Upgrades And Little Counter Modification

Surface mount models secure to countertops without needing drilled openings. They’re ideal for those who want to avoid structural changes during remodels. You can opt for stainless steel or durable plastic, depending on your needs and budget. These trays offer a quick solution for retrofits while keeping plumbing options open.

Advantages Of A Wall Mount Drip Tray For Saving Space Behind Bars

Wall-mounted drip trays free up useful counter space and work well with tap walls. They often connect to drip lines or hoses that lead to floor drains or collection tanks. That setup helps staff free up bar-top workspace for service and cuts clutter in busy tap areas.

Flush-Mount And Integrated Solutions For Custom Bar Builds

Flush-mount drip trays sit neatly within the countertop, creating a premium look. They’re favored in boutique craft bars and custom home bars. Wrap-around designs protect the area around towers and provide continuous guard rails for spills. These solutions require planning but offer a polished finish that suits custom layouts.

Many suppliers stock surface mount, wall mount, and flush-mount drip trays. Demand for specific sizes and finishes can fluctuate, so it’s wise to confirm availability before finalizing a build or retrofit.

Stainless Steel Vs Plastic Drip Trays: Material Comparison

The choice of material impacts performance, sanitation, and aesthetics of the bar. This guide helps operators decide between durable metal and cost-effective plastic for a reliable drip tray with drain.

Benefits Of Stainless Steel Beer Drip Trays: Durability, Corrosion Resistance, And Appearance

Stainless steel is known for its strength, making it ideal for high-traffic bars. It withstands acidic beer spills and cleaning chemicals, maintaining its appearance and function over time.

Welded corners and brass drains on stainless steel trays help reduce leaks and improve durability. The metal finish complements commercial beer tap hardware and kegerator designs, ensuring a professional look.

When A Plastic Drip Tray With Drain Is A Practical, Cost-Effective Choice

Plastic drip trays are lighter and more affordable, which makes them ideal for temporary events or secondary stations. High-quality polymers resist staining and are easy to replace if damaged.

For home kegerators or low-traffic booths, a plastic drip tray offers protection without the high cost of stainless steel options.

Cleaning, Hygiene, And Longevity Considerations For Each Material

Because stainless steel is non-porous, it is easy to sanitize. Its smooth interior and removable grates streamline cleaning, reducing bacterial risk. This makes stainless steel trays a wise choice for frequent washing.

Plastic trays may develop scratches and trap residue, often resulting in more frequent replacement. In budget-conscious settings, anticipate regular swaps to maintain hygiene standards.

Feature Stainless Steel Plastic
Overall durability High; resists dents and wear under heavy use Moderate; may crack or warp under pressure
Resistance to corrosion Excellent against beer acids and cleaners Good, though it can stain with age
Ease of sanitation Smooth, non-porous surface cleans easily and limits bacteria buildup May scratch and hold residue; often replaced more frequently
Weight Heavier; stays in place well
Upfront cost Higher upfront cost More affordable upfront
Common use case Commercial bars, busy venues, long-term installations Home kegerators, temporary stations, budget-conscious setups
Drain choices Often fitted with brass drains and bottle traps Simple drains available; less robust fittings

Choose materials based on traffic, cleaning needs, and design preferences. A drip tray with drain should protect surfaces and maintain tidiness while aligning with the bar’s budget and style.

Key Features To Consider In A Drip Tray For Beer

Selecting the proper drip tray is important for protecting your bar, simplifying cleaning, and preserving pour quality. It’s important to consider features that align with your service style. Whether you manage a bustling draft tower or a compact station, the right drip tray is key.

A reliable drainage system is essential. Opt for a drip tray with a removable bottle trap to catch solids and glass fragments. Brass drains are durable and ensure a secure connection to floor drains or waste lines, provided by suppliers like Installation Parts Supply.

Choose a drip tray that includes a removable grate for faster cleaning. This feature allows staff to clear debris and rinse the trough efficiently. The tray’s interior should have smooth profiles and welded corners to prevent buildup and leaks.

A wrap-around beer drip tray provides excellent protection around multi-tap towers. Ensure the tray’s size matches your tower’s footprint to avoid spills. For single taps or tight spaces, a compact countertop tray offers protection without taking up valuable bar space.

Mounting options are critical for a proper fit and finish. Verify the tray’s mounting type, whether it’s surface, wall, or flush-mount. Also, check its alignment with your tower, tap, or kegerator. Confirm the drain outlet size and compatibility with common waste hoses before making a purchase.

Strong hardware and replaceable parts matter for long-term use. Look for trays with removable traps, replaceable grates, and standard hose fittings. This ensures easy repairs and minimizes downtime. A well-chosen drip tray with a drainage system enhances daily operations and maintains a professional bar appearance.

Installing And Maintaining Your Bar Drip Tray With Drain

Begin by planning the layout around your tap locations and counter edges. Measure spots for the tray and any nearby kegerator to ensure a good fit. Choose surface mount if you want minimal cutting, or select a flush option when a seamless look is needed.

Basic installation process

1. Mark where the tray will sit and make sure the grate and tap handles have enough clearance.

2. Secure the tray per the manufacturer’s instructions, using stainless fasteners for wet environments.

3. For countertop drip tray with drain installation, set the drain fitting and test flow before sealing.

Plumbing tips

Use a removable bottle trap to catch solids and speed up cleaning. When routing hoses, keep a steady slope to the waste point to avoid standing liquid. Match brass drain threads to compatible adapters for durable connections.

How to prevent clogs

Install inline strainers where pours are heavy to cut down on debris. Schedule daily checks and empty the bottle trap as part of bar opening or closing duties. Flush the drain with hot water and a mild cleaner to prevent sticky buildup.

Cleaning, Sanitizing, and Winterizing

Lift grates and scrub stainless surfaces with a food-safe cleaner, then sanitize per health code. For kegerator drip tray maintenance during high season, perform a weekly deep clean and replace worn grates. Seasonal businesses should drain hoses and remove traps before freezing weather to prevent damage.

Parts And Spare Items

Keep spare grates, bottle traps, and drain fittings on hand for quick swaps. Purchase replacement parts from trusted plumbing wholesale distributors like Installation Parts Supply for reliable compatibility and industry-standard materials.

Task Frequency Best Practice
Visual drain check Daily Check for pooling and remove visible debris
Empty bottle trap Daily to weekly, depending on use Remove, rinse, and inspect for solids
Complete grate and tray cleaning Weekly basis Scrub with food-safe cleaner and sanitize
Hose and fitting check Monthly basis Check clamps, slopes, and brass threads for leaks
Winterizing for seasonal use Ahead of freeze season Drain hoses, remove traps, store small parts indoors

Choosing The Right Beer Tap Drip Tray For Your Bar Layout

When selecting a bar drip tray, start by assessing your bar’s layout and service style. Consider the tap tower’s location, the number of taps, and the counter’s depth. Also, think about how staff move behind the bar. This information helps determine whether you need a compact countertop tray or a larger wrap-around model for tower installations.

Assessing Your Layout And Tap Configuration

Check the space around each tap tower and total up the active pouring stations. Multi-tap towers often require a wrap-around beer drip tray to catch overflow from multiple faucets.

For single-tap or portable stations, a small drip tray is ideal. It fits on narrow counters, allowing for quick glass rinsing and cleaning.

Matching Finishes And Materials

Consider durability and appearance together when choosing a drip tray. A stainless steel drip tray with a drain is a good choice for commercial settings. It resists corrosion and is easy to clean.

Opt for a plastic drip tray with a drain for pop-up events or seasonal patios. It’s a cost-effective option for lower-traffic areas where durability is less of a concern.

Traffic, Features, And Drain Choices

High-traffic venues benefit from welded stainless trays with robust brass drains and removable bottle traps. These features prevent clogs and streamline maintenance. Look for trays with removable grates for easy sanitizing.

Smaller bars might prefer a simple plastic drip tray with a drain. It’s lightweight, inexpensive, and suitable for areas with lower volumes.

Budgeting And Lifecycle Cost

Weigh the starting cost of the drip tray against how long it is expected to last. Stainless steel trays are more expensive upfront but require fewer replacements over time. Plastic trays are cheaper initially but may need to be replaced more frequently.

Remember to include the cost of plumbing fittings, grates, glass rinsers, and possible installation by a licensed plumber in your budget. A wise choice balances the quality of the drip tray with your bar’s specific needs and service patterns.

Trusted Suppliers And Where To Buy — Including Installation Parts Supply

Selecting the right supplier for a bar drip tray with drain can save time and help prevent installation problems. Whether you need one item or a complete bar setup, compare suppliers. Look for those who offer in-stock drip trays and clear lead times to plan deliveries around busy periods.

Wholesale drip tray suppliers are useful for large orders because they provide bulk pricing and steady stock levels. Commercial kitchen dealers like WebstaurantStore and restaurant supply houses have a wide range. They offer stainless and plastic models, wrap-around trays, and replacement grates for high-volume bars.

Why Use A Plumbing Wholesale Distributor Like Installation Parts Supply For Drains And Fittings

Installation Parts Supply is a trusted source for plumbing supplies. They offer brass drains, removable bottle traps, and hose adapters that fit bar drip tray systems. Using a plumbing distributor ensures compatibility between tray outlet sizes and drain hardware. Always confirm the drain outlet diameter and order compatible fittings to avoid on-site modifications.

In-Stock Supply, Lead Times, And Matching Accessories

Look over product listings to verify stock levels and available quantities for drip trays. Many suppliers display stock counts for immediate shipment of surface mount and wall mount trays. Request product specs for glass rinsers, replacement grates, and welded stainless options to ensure the supplier can supply both tray units and plumbing components.

Commercial buyers should ask about bulk discounts, shipping lead times, and return policies before placing large orders. Request drain outlet sizes, material finish options, and warranty terms to streamline installation and reduce downtime during build-outs.

Summary

A beer drip tray with drain is a smart investment for cleanliness, safety, and efficiency. Whether opting for a countertop or wall-mount model, choose based on your space and flow. This protects your counters and kegerator from spills.

Focus on features such as removable grates, brass drains, and bottle traps for easier cleaning and reduced clogging. Compatibility with glass rinsers and standard plumbing enhances functionality and hygiene, vital during peak hours.

Your material choice affects both cost and lifespan. Stainless steel is ideal for commercial bars due to its durability and resistance to corrosion. For low-traffic or temporary needs, plastic trays might suffice, balancing cost with functionality.

Use trusted suppliers such as Installation Parts Supply when buying drains and fittings to ensure quality. A well-planned installation and regular maintenance routine will prevent clogs and prolong your drip tray’s life.

Why a Bar Soda Gun is a Classic Piece of Bar Equipment

Ever ponder how a bustling bar can serve perfect sodas in mere seconds? And do it while controlling costs and minimizing storage needs? This concise guide delves into commercial bar soda gun systems found throughout U.S. bars, restaurants, cinemas, and convenience stores. It highlights how a soda gun for bar service can meaningfully boost service speed, reduce per-serving costs, and optimize storage compared to traditional cans and bottles.

Visit the site of Commercial Bar Soda Gun System Cost
We will explore system types, including post-mix and pre-mix, and their core components like Bag-in-Box syrups, CO2, chilled water, and carbonators. You’ll also learn about dispensing options ranging from handheld bar soda guns to fountain towers and draft arms. This overview also covers cooling choices—cold plate versus mechanical refrigeration—and the practical steps for reliable installation and maintenance.

Why Install A Commercial Bar Soda Gun System

Installing a commercial bar soda gun system can dramatically improve service, storage, and profitability for your operation. Post-mix setups combine concentrated syrup, CO2, and chilled water to offer drinks at a significantly lower cost than cans and bottles. This method is ideal for bars, restaurants, cinemas, and convenience stores that require rapid and consistent beverage service.

Cost-per-serving and profitability advantages

Post-mix supplies cut costs substantially. A 5-gallon Bag-in-Box of syrup can make about 30 gallons of finished drink at a 5:1 ratio. This reduces the cost per serving to only cents for a 32-oz pour, while retail prices often exceed $2.50. With a soda gun bar setup and efficient portion control, operators can achieve margins of 80–90%.

Speed of service and operational efficiency

A soda dispenser or handheld bar gun soda can improve serving speed. Staff can pour multiple drinks without leaving the line, reducing wait times during busy periods. This efficiency supports combo deals and higher table turns, increasing average checks and throughput in peak hours.

Storage and space benefits versus cans and bottles

Bag-in-Box containers are compact and shelf-stable, replacing the need for large pallets of cans and refrigerated tanks. This frees up back-of-house space and reduces refrigeration costs. While pre-mix kegs are suitable for low-volume or niche flavors, a bar soft drink dispenser is generally better for busy locations where space matters.

Suitability for different venues

Post-mix soda gun systems are well-suited for medium-to-high-volume environments like gastropubs, stadium concessions, quick-service restaurants, and multiplexes. For mobile operations such as catering trucks or pop-ups, pre-mix cans or small pressurized tanks might be simpler, despite higher per-serving costs. Self-serve venues might prefer all-in-one ice and beverage dispensers, while staffed bars benefit most from a soda gun bar or bar gun soda rig.

The choice of a soda gun bar system depends on volume, menu strategy, and available space. When aligned with operational needs, a bar soft drink dispenser offers better margins, faster service, and a smaller footprint than bottled or canned alternatives.

Soda Dispenser For Bar

How A Commercial Bar Soda Gun System Works

A commercial bar soda gun system combines pressurized gas, chilled water, and concentrated syrup to create consistent fountain drinks. This section explains the mixing methods, essential components, dispensing options, and cooling choices. It helps operators select the right equipment based on volume and layout.

Post-mix vs pre-mix fundamentals

Post-mix systems mix Bag-in-Box syrup with carbonated water at the point of dispense. They use concentrated syrups, offer a low cost per serving, and allow for easy flavor changes. The typical ratio is about five parts water to one part syrup.

Pre-mix systems, on the other hand, ship ready-to-serve drinks in pressurized tanks or 5-gallon Cornelius kegs. These are plug-and-play, reducing setup time. However, they have a higher per-serving cost and require refrigerated storage space.

Core components: Bag-in-Box syrup, CO2, chilled water, and carbonator

Bag-in-Box containers provide concentrated flavors to the dosing valves. One 5-gallon Bag-in-Box can make many gallons of finished beverage when mixed on-site.

CO2 tanks pressurize the system, carbonating water through the carbonator. Regular CO2 checks and leak inspections are essential to avoid service interruptions.

Filtered, chilled water protects valves and preserves taste. The carbonator injects CO2 into this water, making soda water that the post-mix valve blends with syrup.

Dispensing types: handheld soda gun, fountain tower, draft arms

Handheld soda guns are ideal for busy bars. Bartenders use a multi-button gun connected by tubing to remote equipment, ensuring fast service.

Fountain towers mount on counters and connect to under-counter equipment. They are perfect for quick-serve stations where staff pour for customers.

Draft arms or tall towers offer multiple taps for high-volume venues. Their bulky components are housed remotely to reduce noise and heat at the point of sale.

Role of the cold plate and mechanical refrigeration options

Cold plate for soda gun setups chill product lines with ice-filled plates. They are less expensive upfront and cool effectively but require daily ice replenishment and labor.

Mechanical refrigeration units provide steady temperatures without ongoing ice work. High-volume bars and venues with limited staff often prefer these for consistent cooling and lower daily labor needs.

Choose cooling based on footprint, labor capacity, and temperature control needs. Smaller operators might consider a soda gun system for home use as a compact alternative. Commercial venues, on the other hand, scale to full refrigeration.

How To Choose The Right Soda Gun For Bar Service

The right equipment is key to improving speed, reducing waste, and boosting staff comfort. It’s essential to align your menu and sales patterns with a system that offers the right balance of channels, ergonomics, and capacity. Small bars might prefer simpler setups, while high-volume venues require robust, multi-channel solutions designed for continuous use.

Number of channels/valves and flavor variety

Start by counting the flavors you sell the most. Most establishments use 2–6 valves for staples like cola, diet cola, and lemon-lime. Save extra channels for seasonal or promotional flavors to increase repeat business. Before adding rare flavors, track sales for three months to avoid unused valves.

Soda gun for bar versus bar soda machine: ergonomics and form factor

Consider the difference between a handheld bar gun and a fixed bar soda machine. Handheld guns are great for busy back bars and crowded events, providing mobility. The weight, grip, and button layout are critical for reducing bartender fatigue during long shifts.

Countertop or tower bar soda machines offer a stable serving point, ideal for server stations or fixed counters where portability is not necessary. They work well when multiple staff members share one dispensing spot.

Key handheld soda dispenser features to evaluate

The placement and feel of buttons can significantly speed up pours. Group core drinks on adjacent buttons for quick access. Opt for a handheld soda dispenser with removable, easy-to-clean nozzles to prevent syrup buildup.

Hose length is also important. Ensure it’s long enough to serve all stations without kinks. Label each line with permanent markers or tags to keep brands and syrup types clear during changeovers.

Matching system capacity to expected volume and service style

Low-volume venues might choose small post-mix systems or pre-mix setups to lower initial costs. Busy bars, on the other hand, should invest in multi-valve systems with mechanical refrigeration, a larger Bag-in-Box inventory, and portion-control valves. This maintains consistency and reduces syrup waste.

Consider a bar gun dispenser or soda gun for bar that supports portion-control or electronic pumps when slow pours impact profit. Align your equipment choice with service speed, staffing levels, and peak-hour demand for optimal results.

Best Practices For Installation And Soda Gun Setup

Proper soda gun setup begins with planning plumbing, electrical, and parts sourcing before mounting any equipment. A detailed checklist helps avoid downtime and costly rework. Follow these steps for a smooth soda gun installation, ensuring restaurants and bars can quickly serve consistent drinks.

Professional plumbing and water-line considerations

For hard-plumb post-mix systems, a dedicated cold water line and a shut-off valve near the carbonator are essential. Install a floor drain for condensation or overflow. Use a beverage-grade water filter and replace it every 3–6 months, more frequently in hard water areas, to protect equipment.

Ensure dedicated electrical circuits for mechanical refrigeration and the carbonator. Provide technicians with clear access to valves and service panels for efficient repairs.

Tubing cuts, ear clamps, barb fittings, and line labeling

Measure and cut tubing runs with a clean, square cut. Use ear clamps, barb fittings, and crimp them securely. Test each joint for leaks with a soap solution before completing the installation.

Label each line with permanent markers or adhesive tags, indicating syrup brand and flavor. Labeled lines streamline syrup swaps and troubleshooting, reducing service interruptions.

Mounting the soda gun housing, drip cup connections, and ventilation clearance

Attach the mounting plate and secure the soda gun housing to the bar using suitable fasteners. Connect the hose from the gun to the drip cup for spill and condensate drainage. Empty and clean drip trays daily for hygiene and appearance.

Ensure proper ventilation clearance around refrigeration units and carbonators, adhering to manufacturer specifications. Adequate airflow prevents overheating and facilitates safe access for routine checks.

Using a distributor and sourcing Installation Parts Supply parts

Acquire reliable soda gun parts and supplies from reputable plumbing wholesalers and distributors, such as Installation Parts Supply. Source beverage-grade hoses, ear clamps, barb fittings, nozzles, cold plates, and replacement components that match equipment specifications.

Collaborate with experienced installers or equipment specialists for calibration of Brix ratios, CO2 regulator setup, and leak testing. Maintain a stocked spares list for ear clamps, barb fittings, nozzles, and hoses to minimize downtime of the soda gun dispenser.

Cleaning, Maintenance, And Troubleshooting

Regular care is essential for a commercial soda system’s reliability and taste. Daily tasks, weekly sanitation, and scheduled service prevent downtime. Always use genuine soda gun parts for replacements to maintain performance and flavor.

Daily cleaning routines for nozzles and valves

At the end of the day, remove nozzles and clean valve faces to prevent syrup drying. Soak removable tips in a manufacturer-approved cleaner and rinse with potable water. Clean drip trays and wipe the soda dispenser gun’s external housings to avoid sticky buildup.

Weekly line sanitation and drip tray maintenance

Sanitize syrup and water lines weekly, following the manufacturer’s instructions. Flush lines with an approved sanitizer, then run potable water until all residue clears. This prevents flavor carryover. Also, disassemble ice chutes and dispensing areas for a deeper clean when present.

Periodic maintenance: CO2 checks, filters, and professional service

Regularly check CO2 tank pressure and test fittings with a soap solution for leaks. Replace water filters every three to six months to protect the carbonator and maintain taste. Schedule seasonal inspections for refrigeration, cold plates, and overall calibration by a certified technician.

Common problems and how to identify them

  • Syrup buildup: sticky nozzles or slow pours — inspect the nozzles, clean the lines, and replace worn gaskets for proper sealing.
  • Flat soda: weak carbonation often means low CO2 pressure, an empty tank, or a cooling problem — check tank levels and system temperature.
  • Leaks: trace wet spots to ear clamps, barb fittings, and hose joins — tighten or re-crimp tubing and replace failing soda gun parts.
  • Flavor contamination: off-tastes may indicate cross-connection or poor sanitation — flush the lines and confirm correct labeling and hose routing.

When facing persistent faults, follow the equipment maker’s troubleshooting steps before replacing parts. Keep a basic parts kit with extra nozzles, O-rings, and clamps for quick repairs and uninterrupted service.

Core Components, Parts, And Upgrades For Long-Term Use

Ensuring a commercial soda system’s reliability hinges on the right parts and timely upgrades. Regular maintenance of wear items prevents downtime and safeguards profit margins. Below, we highlight the core components and optional enhancements critical for sustained performance.

Core soda gun parts

  • Removable soda gun nozzles make daily cleaning easier and help reduce syrup buildup. Replace them at the first sign of wear to preserve flow and flavor.
  • Food-grade hoses, ear clamps, and barb fittings constitute the fluid path. Keep spare hoses and clamps ready to address leaks promptly during service peaks.
  • Use a cold plate sized for your soda gun installation’s valve count and peak volume. Correct sizing helps maintain temperature and limit foaming.
  • CO2 regulators and carbonator components need regular service. Worn diaphragms and seals can hurt carbonation and should be inspected routinely.

Upgrades that improve control and system insight

  • Portion-control valves ensure fixed pour volumes, reducing over-pouring. High-volume venues benefit from these valves to protect profit margins.
  • IoT monitoring adds alerts for low syrup, low CO2, and temperature changes. Remote dashboards make multi-location troubleshooting easier for managers.
  • Touchscreen controls and flavor-infusion modules create upsell opportunities in self-serve formats. They also make customization easier for guests and staff.

Ice-related upgrades and bin selection

  • Integrated ice-and-beverage systems speed service by combining drink dispensing with ice handling. Choose bin size according to peak demand, from smaller 100 lb bins to 580+ lb commercial options.
  • Ice type should match the dispense profile. Cubed ice offers slower melting and better dilution control, while cubelet or nugget ice chills quickly but may dilute beverages earlier.

Where to source reliable parts and service

  • Acquire fittings, clamps, hoses, nozzles, and installation hardware from established plumbing wholesale distributors. Building relationships with suppliers shortens lead times.
  • Installation Parts Supply stocks common replacement items and installation hardware used by service technicians. Having a local account expedites emergency parts replacement.
  • Partner with certified service technicians for regular inspections. Ongoing maintenance agreements help limit surprise failures and extend the life of the equipment.

Cost Considerations And Return On Investment

Installing a commercial bar soda gun system involves various costs. These include the initial purchase of a soda gun machine, a cold plate or refrigeration unit, a carbonator, a CO2 tank, water filtration, and professional installation. Skilled technicians ensure proper installation, including tubing, crimps, mounting, and refrigeration hookups. This is essential for warranty protection and long-term performance.

Upfront Costs

Basic handheld setups are more affordable than full fountain towers. Investing in a quality bar dispenser gun and a reliable cold plate increases the initial cost. Mechanical refrigeration and a commercial carbonator are additional expenses for higher volume or strict temperature control needs.

Day-To-Day Operating Costs

Operating the system involves ongoing expenses. These include BiB syrup, CO2 refills, water, filter cartridges, electricity, and cleaning supplies. Regular service and part replacements are necessary to maintain freshness and consistency. Tracking monthly operating costs helps in budget forecasting.

How To Estimate ROI

Post-mix serving costs are significantly lower than bottled or canned drinks. Many venues see a return on investment within months, depending on volume. Calculating ROI involves comparing cost-per-serving, increased throughput, and higher check averages against initial and ongoing expenses.

Budgeting For Spares And Replacements

It is wise to plan ahead for spares and replacements. This includes nozzles, hoses, clamps, regulators, and periodic cold plate service. Having spare parts readily available, sourced from established distributors like Installation Parts Supply, can minimize downtime. For those considering a soda gun for home, similar spare parts and basic maintenance should be planned for.

Practical Buying Checklist

  • Get multiple quotes for equipment and installation.
  • Compare long-term operating costs versus cans and bottles.
  • Account for labor savings created by quicker pours and self-serve formats.
  • Allocate a maintenance contract to protect uptime and quality.

Closing Summary

Commercial Bar Soda Gun Systems bring significant benefits to establishments that frequently serve fountain drinks. These systems, which include a post-mix soda gun dispenser, Bag-in-Box syrup, CO2, chilled water, and a carbonator, significantly reduce costs and enhance service speed. The right bar soda gun system ensures it meets the venue’s volume and service needs.

Ensuring the soda gun is set up correctly and maintained regularly is essential for consistent quality. This includes proper handling of tubing, ear clamps, barb fittings, and labeling. Daily nozzle cleaning, weekly line sanitizing, CO2 checks, and filter replacement are also critical. These steps keep the machines running smoothly and extend the life of the soda gun parts.

Upgrades like portion-control valves and IoT monitoring can help reduce waste even more while improving consistency. Obtaining supplies from trusted sources, such as Installation Parts Supply, also helps minimize downtime. When implemented and maintained properly, a soda gun dispenser offers faster service, reduced storage needs, and a strong return on investment for bars, restaurants, and other venues.

The Innovation at Oetiker Tool Corporation Continues

In excess of 70% of service calls for leaking hose connections are due to improper clamp installation. The right Oetiker Clamp Pliers Tool can solve this problem. The Oetiker tool is a purpose-built pliers tool designed for ear-style clamps. It creates a low-profile, permanent seal on barbed fittings and hoses. Unlike generic pliers, it delivers uniform, repeatable crimps. This reduces leak issues and extra rework in various fields, including plumbing, beverage draft systems, and automotive hoses.

More information about Oetiker Crimp Tool
Technicians looking for the best oetiker pliers need clear, practical guidance. They want to know how to size clamps, crimp correctly, and which brands are durable. Stainless steel Oetiker clamps and sizing charts are available from industry retailers and specialty distributors. Installation Parts Supply is a reliable source for clamps and oetiker tools in the plumbing wholesale market.

What Are Oetiker Clamps And How They Work

Oetiker clamps are ear-style, low-profile bands designed to form a tight, permanent seal around hoses and barbs. They are precision formed and stamped from stainless steel for strength and corrosion resistance. These clamps are common in plumbing, beverage draft systems, and automotive applications where a space-saving, tamper-resistant connection is needed.

Clamp Design And Materials

Most Oetiker clamps are made from stainless steel, often 301 or 304 grades, to prevent corrosion in wet conditions. The construction uses a continuous band with an integral ear that can be crimped. This stamped, formed construction creates a consistent profile and even contact around the hose and barb.

The low profile helps fit clamps in tight spaces. Uniform contact reduces stress points that may cut or deform softer hose materials. Stainless steel versions are the standard choice for draft beverage systems and plumbing where corrosion must be minimized.

Ear-Style Clamp Mechanism And Why It Provides A Permanent Seal

The ear is compressed using a purpose-built tool that deforms the ear and reduces the clamp diameter. A proper crimp creates uniform radial pressure that squeezes the hose against the fitting. This mechanical deformation makes the joint tamper-resistant and permanent.

Once crimped, the ear cannot be re-tightened like a screw clamp without cutting the clamp off and replacing it. That fixed seal is especially useful for sanitary systems and safety-critical lines. Using the correct oetiker ear clamp tool or oetiker clamp pliers tool ensures reliable seals and consistent crimps.

Common Uses In Plumbing, Beverage Draft Systems, And Automotive Hoses

In beverage draft systems, stainless Oetiker clamps maintain sanitary, corrosion-resistant hose connections. Distributors and suppliers often offer starter kits and sizing guides tailored to kegerator and bar installations.

In plumbing and HVAC, these clamps are used on PEX, rubber, and multilayer hoses where a permanent, low-profile connection is preferred. In automotive work, they secure fuel lines, vacuum hoses, and coolant connections where vibration resistance and space savings matter.

Oetiker Marlette MI

Application Common Material Why It Works Best Tool
Draft beverage systems Stainless steel 304 Clean operation, corrosion resistance, compact profile oetiker clamp tool
Domestic plumbing Stainless steel 301/304 Reliable seal on PEX and rubber hose lines oetiker crimp pliers tool
Automotive hose assemblies Treated stainless steel Strong vibration resistance with a compact fit oetiker hose clamp pliers

About The Oetiker Clamp Pliers Tool

A secure, permanent hose connection depends on using the right tool. An oetiker tool is designed to create the ear profile on ear-style clamps. These clamp pliers offer a unique jaw shape and leverage, ensuring a uniform crimp with each use.

Purpose And How It Differs From Standard Pliers

Oetiker clamp tools feature contoured jaws that mirror the ear’s geometry. This design prevents slipping and ensures even compression. Professionals opt for tools like Beta clamp pliers, which reduce hand fatigue and maintain alignment during repeated use. Unlike standard pliers, oetiker tools provide the precise jaw profile and controlled travel needed for a proper crimp.

Step-By-Step: Using The Clamp Pliers For Installation

1. Select a clamp size that fits the hose and fully covers the barb length.

2. Position the oetiker clamp over the hose before attaching the hose to the fitting. Ensure the clamp is positioned so the ear is accessible.

3. Line up the pliers for oetiker clamps, making sure the jaws sit evenly over the ear profile.

4. Squeeze with steady pressure using the oetiker clamp installation tool until the ear is fully compressed. Avoid partial crimps that can leave gaps.

Step 5: Inspect the crimp for full engagement and even deformation. If the crimp is incomplete, replace the clamp—these clamps form a permanent seal.

Safety And Best-Practice Tips When Compressing The Ear

Wear safety glasses to protect against small metal shards when cutting or reworking clamps. Use the correct oetiker clamp tool profile to prevent slipping and reduce hand strain. Confirm clamp sizing with a chart before starting; an undersized clamp can damage the hose, while an oversized clamp will not seal. For beverage and plumbing work, choose stainless steel clamps and clean the hose and barb surfaces for a sanitary connection.

Selecting The Right Oetiker Tool And Clamp Size

Selecting the proper clamp and tool starts with accurate hose measurement and a clear understanding of the work environment. Measure the hose’s outer diameter (OD) once it’s fully seated on the barb. Use sizing charts from suppliers like KegOutlet and Installation Parts Supply to find the right clamp size for your OD. Ensure the clamp’s post-crimp range includes your measured OD for a reliable seal.

Clamp width matters just as much as clamp diameter. Narrower clamps fit tight spaces and low-profile assemblies. Wider clamps provide higher sealing force for pressurized lines. Confirm the clamp’s length and ear profile match the hose and fitting before purchase.

How to measure hose diameter and pick the right clamp size

  • Push the hose fully onto the barb before measuring the outer diameter (OD).
  • Use the manufacturer sizing chart and select a clamp with a post-crimp range that covers your OD.
  • Choose clamp width based on the application: narrow for limited space, wider for greater sealing force.

Tool options: single-purpose, adjustable, and heavy-duty models

Single-purpose clamp pliers are a budget-friendly option for standard ear profiles and occasional jobs. Adjustable oetiker tools with interchangeable jaws are versatile for shops needing to handle different ear shapes and widths. Heavy-duty models are for trade professionals needing consistent crimps across many cycles.

When choosing, consider ergonomics, tool weight, and jaw compatibility. A compact, lightweight oetiker clamp tool is ideal for occasional work. A professional-grade oetiker clamp installation tool with high leverage reduces hand fatigue during repetitive installs.

Choosing stainless clamps and tools for corrosion resistance

For wet plumbing and beverage draft systems, stainless steel clamps are the standard choice. They resist corrosion and maintain sanitary conditions in draft beer lines and moist environments. Match tool finishes to the environment; rust-resistant or stainless components extend tool life.

For field service and brewery work, use a dedicated oetiker hose clamp pliers that fits stainless ear clamps without deforming the profile. Stocking an oetiker clamp pliers tool and a compatible oetiker tool ensures you can complete installs with the correct hardware and minimal rework.

Use Case Clamp Recommendation Recommended Tool Key Notes
Residential plumbing repairs Standard stainless ear clamp, narrow width Dedicated single-purpose oetiker tool Affordable, simple to use for occasional fixes
Draft beverage lines Stainless steel, wider profile for sealing Oetiker pliers with a corrosion-resistant finish Requires sanitary-grade materials and long-term corrosion resistance
Professional repair and production work Chart-sized range of stainless clamps Heavy-duty oetiker clamp installation tool, adjustable jaws Durable, high-leverage tool reduces fatigue and improves consistency

Comparing Oetiker Tools: Quality, Brands, And Where To Buy

Picking the right oetiker tool requires reviewing both real examples and overall build quality. The Beta 014730010 (1473A) stands out as a professional-grade option, weighing about 393 g. It is known for its liable jaw profile accuracy. Various manufacturers offer pliers for oetiker clamps, differing in materials, finish, and warranty terms.

As you compare tools, focus on ergonomics and overall weight. Tools weighing 300–400 g reduce fatigue while providing enough leverage. Features like cushioned grips and well-shaped handles are essential for repetitive tasks. The best oetiker pliers offer a balance between leverage and user comfort, ensuring consistent crimps.

Jaw profile compatibility is essential. Mismatched jaws can lead to poor crimps and clamp failure. Always check the jaw shape against the ear profile of your clamps before buying. A tool with interchangeable jaws can save time when working with multiple clamp sizes.

Below is a concise comparison to help guide your selection.

Model / Type Weight (g) Strengths Best Use
Beta 1473A / 014730010 393 Precise jaw profile, trade warranty, durable finish Trade plumbing and beverage systems
Specialty interchangeable-jaw pliers 320–420 Good ergonomics and versatility across multiple ear profiles Work areas using multiple clamp styles
Heavy-duty crimping pliers 420–550 More leverage for thicker stainless clamps with a sturdy frame Industrial hose work
Tool-and-clamp starter kits Tool about 350 Convenient for new shops, matched clamp sizes Small shops and beverage draft setups

When shopping for Beta clamp pliers or other brands, buy from authorized dealers. This ensures warranty support and genuine products. KegOutlet and similar suppliers offer Oetiker clamp kits and tools for draft systems. Installation Parts Supply is a recommended source for trade pricing, bulk orders, and professional-grade stainless Oetiker clamps.

It is best to buy from vendors with clear return policies and reliable parts service. A verified supplier can replace jaws, honor warranties, and provide spare clamps. For dedicated users, investing in a high-quality oetiker clamp pliers tool pays off in consistent crimps and fewer reworks.

Maintenance, Troubleshooting, And Alternatives

Maintaining tools in top condition is essential. Regular cleaning, light lubrication, and dry storage prevent rust and wear. Inspect jaws for deformation and replace tools that no longer shape the ear correctly to avoid wasted clamps and failed seals.

Maintaining pliers and prolonging tool life

Clean fluids and debris from the oetiker clamp pliers tool after each use. Apply light machine oil to pivot points and rust-inhibiting spray for wet environments. Store the tool in a dry place and inspect teeth and jaw profiles for chips or bending.

Common installation issues and how to fix them

Clamps that are too small can cut into hoses or fail under pressure. Use a sizing chart to match hose diameter to clamp size. Choose pliers for oetiker clamps that match the clamp profile. Uneven crimps often result from misalignment. Ensure the oetiker ear clamp tool seats fully over the ear and the jaws align before compressing.

When a crimp is poor, cut the damaged ear clamp off and install a new one. Use a clamp cutter or tin snips with care to avoid nicking the hose or fitting. For applications needing frequent rework, consider adjustable clamp systems that allow removal and reuse, while noting trade-offs in profile and permanence.

Alternative options and when to use them

For serviceable connections and future disassembly, worm-drive clamps are a suitable option. They are adjustable and reusable but bulkier than ear clamps. Crimp-style swaged or ferrule clamps create permanent mechanical bonds with a swaging tool. They serve fuel lines and hydraulic fittings where specs require them.

Pick an oetiker clamp installation tool or an alternative according to serviceability, space constraints, pressure demands, and the corrosion environment. Selecting the right approach reduces failures and saves time during repairs.

Closing Summary

Oetiker Clamp Pliers Tool selection and proper use are key to a lasting, leak-free connection. The tool is designed to provide consistent crimps on ear-style clamps. Whether you are working on plumbing or beverage systems, matching the clamp size and material is essential. Always measure hose OD accurately and refer to sizing charts to prevent undersized or loose fittings.

Choose professional-grade equipment when reliability matters most. The best oetiker pliers and a dedicated tool minimize rework and ensure even crimps. Brands like Beta offer clamp pliers that complement quality clamps. Specialist suppliers provide charts and replacement parts, supporting trade use. A proper installation tool ensures secure seals with a low profile that hold up against vibration and corrosion.

For sourcing, buy clamps and tools from reputable plumbing wholesalers and distributors, such as Installation Parts Supply. They offer stainless Oetiker clamps, spare parts, and professional-grade pliers. Using the correct clamp size with the proper Oetiker Clamp Pliers Tool and following best practices results in neat, permanent hose connections. These are ideal for both commercial and residential applications.

The Applications of a 1 2 X 1 2 X 3 8 Tee in Mixed-Size Systems

Over 70% of service teams choose forged brass fittings for recurring repairs. They hold up longer against leaks than lower-cost options. Brass Forged Compression Tee’s are essential for plumbers, MRO technicians, and engineers. They often require trustworthy pipe fittings and durable brass hardware. They unite brass corrosion resistance with forged-body strength. They are well suited for plumbing, hydraulic, pneumatic, and instrumentation systems.

View details about 1 4 Compression Tee
Supplier catalogs typically present pricing in a clear format. For instance, SKU FIT-271 is a 5/16″ Brass Compression Tee. It is priced at about $17.69 for one unit and about $8.84 each at three units. This pricing pattern shows how brass hardware and fittings are marketed through wholesale distributors like Installation Parts Supply.

Buyers and engineers gain an advantage from forged construction when choosing parts for leak-resistant assemblies. This guide helps verify compatibility with copper, aluminum, and thermoplastic tubing. It also helps determine when forged brass tee fittings are the right option for your system.

Important Takeaways

  • Forged brass compression tees offer superior durability for plumbing and industrial uses.
  • They are sold across wholesale channels with clear retail and quantity pricing.
  • Examples like FIT-271 reflect common pricing patterns and SKU structures in the market.
  • When fitted properly, these brass fittings are compatible with multiple tubing materials.
  • Installation Parts Supply and similar distributors provide inventory and technical support for buyers.

Why Select Forged Brass Tee Fittings For Plumbing And Industrial Use

In plumbing and industrial applications, forged brass tees provide a strong mix of durability and longevity. Because the metal is forged, its grain structure is improved, which helps reduce internal imperfections and improve fatigue resistance. That makes them a leading option where dependable connections are required.

Compression fittings made from forged brass exhibit superior corrosion resistance compared to some alloys and plated materials. Their capacity to handle water, many hydraulic fluids, and typical industrial conditions without rapid degradation is notable. This reliability minimizes maintenance needs and supports long-term installations.

Forged components generally exceed cast or machined alternatives in overall strength. They can handle higher mechanical stress and resist cracking better, even under conditions of vibration or handling. This translates to fewer failures and less downtime for installers and maintenance teams when using forged brass tees over weaker cast fittings.

These fittings are designed to handle a practical range of pressures and temperatures, suitable for plumbing and low- to medium-pressure hydraulic applications. Brands like Parker and Eaton offer straight compression fittings with ratings of up to about 500 PSI and operating temperatures from -65°F to +250°F. It is important to note that some designs are not intended for high-vibration steel tubing runs or gaseous media, so correct selection matters.

In plumbing and compressed-fluid systems, forged brass tees are notable for their durability and corrosion resistance. Plumbers, HVAC technicians, and industrial buyers often favor them. Where dependable sealing and sound mechanical performance are needed, forged brass tees and compatible compression fittings remain a practical, well-established choice.

1/2 Inch Compression Fitting

Understanding Brass Forged Compression Tee’s

Forged compression tees are compact, dependable components for splitting or combining flow in fluid systems. Machined to tight tolerances, these brass fittings help ensure a precise fit with tubing and threaded ports. Catalogs list several styles, including branch, run, and union tees, along with elbows and straight fittings for easier system planning.

Available product configurations

Branch tees create a perpendicular branch off a run. Run tees maintain three passages in line for balanced flow. Union-style tees have a detachable section that simplifies maintenance access. These styles are offered in both SAE and NPTF-threaded versions, helping them match a wide range of valves and components.

Tubing compatibility

Compression tee fittings are compatible with copper and aluminum tubing without inserts. With thermoplastic tubing, a support insert is required to prevent collapse and maintain a tight seal. In certain product lines, manufacturers advise against using these fittings with steel tubing to avoid premature wear in mixed-metal systems.

Where they perform best

Brass forged compression tee’s offer corrosion resistance and ease of installation, making them ideal for plumbing. They are likewise common in hydraulic and pneumatic installations such as control manifolds and fluid power lines. Instrumentation and HVAC systems also benefit from their compact form in retrofit applications.

OEMs, integrators, and MRO teams often choose Brass tee fittings and Compression tee fittings because of their predictable performance and cross-compatibility. Their availability in full-pattern and light-pattern versions helps address different thread engagement and clearance requirements without changing part families.

Certain catalog entries provide lead-content notes for local plumbing code compliance. Spec sheets detail whether a part is Not lead free and whether the part number indicates a Light Pattern modification. This information helps buyers and technicians select the right item for safety, code compliance, and long-term reliability.

Compression Fitting Features And Operation

Compression fittings provide a dependable, solder-free connection through a straightforward mechanical process. A nut, sleeve (ferrule), and body work together. The ferrule is compressed around the tube when the nut is tightened. This compression forms a tight seal between metal surfaces, capable of withstanding typical plumbing and hydraulic pressures without the need for adhesives.

Nut, sleeve, and body action

As it tightens, the nut pulls the ferrule into the body of the fitting. As the ferrule bites the tube, it creates a radial seal and axial grip. That design is valuable in applications that require a steady, leak-resistant joint. Companies such as Parker and Eaton test these parts to confirm compatibility with standard Brass fittings and related Brass hardware.

Hand-tight, tool-free, and grab-ring options

Some fittings include grab rings for fast, hand-tight assembly. These designs save time for maintenance and field installation teams. Standard compression tee fittings, on the other hand, require a torque wrench for full compression and optimal performance. Hand-tight designs are appropriate when they have been validated for the intended application.

Reuse and maintenance

Brass compression fittings can often be reused when disassembled properly, although ferrules may deform. Replacing the ferrule and checking the nut before reassembly ensures a leak-free connection in critical systems. Manufacturers and suppliers usually recommend following reuse guidelines so the long-term reliability of Brass hardware and Compression tee fittings is not compromised.

Interchangeability and performance

Components undergo rigorous pressure and temperature testing. This allows installers to confidently choose compatible parts. Compression fittings generally interchange among SAE-standard brands when size and standard match. This makes it easier to combine parts from trusted pipe fitting brands without reducing performance.

Sizing, Selection Criteria, And Typical Part Types

Accurate sizing is essential when choosing fittings. Make sure the Tube O.D. matches every compression port. For threaded ports, match the NPTF thread size to the required male or female thread. A minor mismatch can still result in leaks or costly rework.

Choosing the right connection type and size

Use calipers to measure the Tube O.D. and select the appropriate compression ferrule and nut. For threaded ports, identify the NPTF threads spec and the nominal size, such as 1/8″ or 1/4″ Male NPTF. Catalogs often show both dimensions, such as 1/4″ Tube O.D. x 1/8″ Male NPTF or 5/16″ Tube O.D. x 1/8″ Male NPTF.

Understanding product variations

Male branch tees are prevalent in many systems, featuring a compression x compression x male NPTF configuration. These fittings enable a tubing run with a threaded branch. Manufacturers often encode size and pattern information in the part number. An “L” suffix usually indicates a light pattern fitting with a shorter thread length that is often interchangeable with full pattern parts.

Example Part Configuration Typical Catalog Size Notes
BF18291 Compression x Compression x Male NPTF 1/4″ Tube O.D. x 1/8″ Male NPTF Typical cataloged configuration
BF18292 Compression x Compression x Male NPTF 1/4″ Tube O.D. x 1/4″ Male NPTF Typical configuration for matching branch thread
BF18293 Compression x Compression x Male NPTF 5/16″ Tube O.D. x 1/8″ Male NPTF Typical catalog size for mixed tube and branch dimensions

Pressure class and application suitability

Most brass tee fittings are suitable for low- to medium-pressure lines. Some straight compression fittings can handle pressures up to 500 PSI and temperatures from -65°F to +250°F. Always review the product sheet for the exact pressure class before using the part in hydraulic or instrumentation systems.

Manufacturers often caution against using some compression designs with gaseous media. Systems exposed to heavy vibration or tube movement may need alternative fittings or extra support to avoid premature failure. Always confirm material compatibility because some fittings may not be suitable for copper, aluminum, or thermoplastic tubing. Thermoplastic lines commonly require an insert.

Sourcing, Pricing, And Bulk Buying Through Installation Parts Supply

Installation Parts Supply offers detailed SKU-level information and quantity-based breaks for quick comparison. Their catalog examples include both retail pricing and bulk pricing for common Brass hardware products. That makes it easier for buyers to plan budgets and purchasing schedules.

Example pricing

Small-run pricing shows the difference between single-unit retail and discounted wholesale tiers. For instance, a 5/16″ compression tee, FIT-271, is priced at $17.69 retail but drops to around $8.84 per unit in bulk. Parts like BF18291, BF18292, and BF18293, which are SAE male branch tees, typically range from $7.16 to $7.79. These prices highlight the savings when purchasing in bulk.

Stocking and ordering for distributors and MROs

Distributors and maintenance teams benefit from online visibility of SKUs and inventory counts. Installation Parts Supply offers a Request a Quote workflow. It collects customer information and shipping details to provide accurate quotes. For bulk purchases, additional shipping information helps support firm quotes.

In-stock items facilitate quick fulfillment for repairs and installations. Users may submit bulk-order requests or RFQs, attach project notes, and ask for certifications. This streamlines procurement for OEMs and system integrators.

Why choose Installation Parts Supply as a wholesale distributor

Installation Parts Supply offers a wide inventory to meet the needs of MROs, contractors, and integrators. Their product range includes Wholesale brass fittings and Brass Forged Compression Tee’s. Their technical support helps confirm compatibility with different tubing materials and guides buyers on part selection.

The distributor offers guidance on SAE and pressure connections standards. Replacement sleeves and nuts are available, and their team can also assist with selecting the right part. That support can reduce specification time and simplify large-volume purchasing.

Lead times, customer support, and fulfillment

Well-established distributors often combine clear Compression fittings pricing with lead-time estimates and customer support. Installation Parts Supply handles quote requests, provides certification data, and coordinates freight for larger shipments. Because of their inventory depth, responsiveness, and Brass hardware expertise, procurement can remain reliable across both small and large projects.

Conclusion

Brass Forged Compression Tee’s provide dependable, corrosion-resistant connections across many systems. Their forged build and ferrule-based sealing ensure leak-free performance. They are suitable for copper, aluminum, and thermoplastic tubing, though thermoplastic installations require inserts.

When choosing compression fittings, always confirm that the tube O.D. and thread type match. Select the proper pattern for the available space, and verify the pressure and temperature ratings. Material compatibility remains essential, so use inserts for thermoplastic lines and verify that the fitting satisfies your application’s pressure class.

When purchasing, distributors like Installation Parts Supply are worth considering. They can offer competitive pricing, bulk discounts, and technical assistance. A quote request can help confirm lead times and bulk pricing. Use common SKUs to compare options and consult their support team for safe, secure installations.